Power BI Quick Tips: Dealing with snapshot data

Snapshot data. Perhaps you’re familiar with the term. It comes in handy in Microsoft Power BI when you need a period-ending date to tie your data to a point in time. Let’s walk through it.
Usually, data is incremental and based on some period (hourly, daily, weekly, monthly etc.). The data’s incremental characteristic makes it easy to aggregate and show trends over time. However, there are instances when data is not incremental and is provided in the form of a snapshot, requiring a date/timestamp to tie it to a specific point in time.
Snapshot Data Overview
So, what is a snapshot? Snapshot data is data that represents the state of a system at a specific point in time. Snapshot data is not typically aggregated over time. Extracts from operational systems or manual data entry can generate snapshot data; with the extracts in the form of text files or Excel spreadsheets. There may be transaction level timestamps. But typically, the period timestamp for the data is missing. Let’s address the case of the missing period timestamp.
Snapshot Data Framework
The key to dealing with snapshot data using Power BI is planning and establishing a framework based on a solid data architecture with special attention to naming conventions (more on naming conventions in a bit).
First, pick a location to store your snapshots. For this example, I will use a OneDrive folder. I am using a folder because Power BI has “folder” listed as a data source, making it easy to place new snapshots inside the folder. Also, the Power BI Service is updated (usually about an hour) when new content is added to the OneDrive folder.
Second, establish a naming convention for your snapshots. For this example, I use weekly snapshots and adopted the following naming convention; “WK_YYYY-MM-DD” where “YYYY-MM-DD” represents the week ending date. This date will be used later in Power BI. See the following figure.
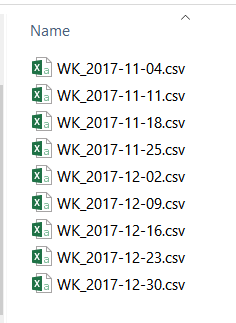
Finally, and most importantly, the structure of the snapshots must be identical across all files.
Using Power BI to load Snapshot Data
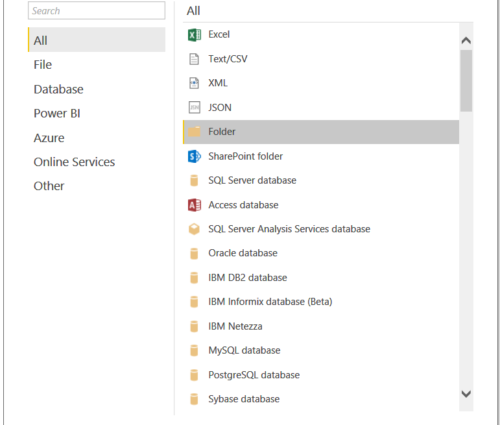
Use Power BI to import the snapshot data. Start Power BI and select “folder” as the data source.
Navigate to the folder where the snapshot data is stored and choose combine and edit. The filename (“Source”) is included in the imported data.

Create a new field (“Period Ending”) as a date from the “Source” field. “Add column from example” is the best way to accomplish this. Using “add column from example” requires typing an example of what the “Period Ending” field should look like and Power BI does the rest of the work. Delete unnecessary columns and change the type of the “Period Ending” field to an appropriate type (in this case date). You now have a dataset with a date field defining the period for the snapshot.

Caveat
For this approach to succeed, you need to:
- Define a naming convention identifying the snapshot date or time period. Alternatively, it is far better to include the snapshot period in the data.
- Verify the structure and content of your data snapshots.
- Define a snapshot storage location.
- Let Power BI work for you.