Securing Web Applications Using Open Id & Azure AD

Security is a topic that needs to be discussed and thoroughly considered while designing any software. When done properly it can prevent unwanted behavior or access. In my opinion, the most difficult aspects of security are its evolving nature and the difficulty of staying current. When starting a new project, we can’t avoid spending extra time researching the previously obtained security knowledge and tools to see if it’s still valid and whether a vulnerability has been found.
Login and authentication can be the first line of defense in some scenarios for web apps, and it can be coded from scratch by validating users against their username and password in the database. Additionally, it is essential to salt and hash the password, however using .NET Identity or an external authentication service is a better approach. It provides separation of concern and saves research and implementation time with the assumption that this is a reliable and up to date framework or service.
In this post I’ll discuss how to authenticate users that have accounts in Azure AD using a template that can be generated by Visual Studio. I’ll build on that in a following post discussing securing API requests by generating tokens for requests made by authenticated users.
Creating a Testing Azure AD Instance
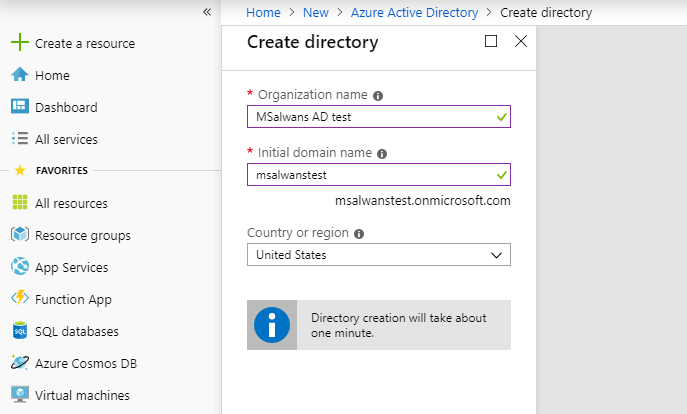
We will start by creating a new Azure AD instance for testing. To do that we need to navigate to Azure portal and click “Create a resource” then search for “Active Directory” then simply click the “Create” button. Following these steps will take us to the below form where we can name our new AD, which must be unique and follow the domain naming conventions.
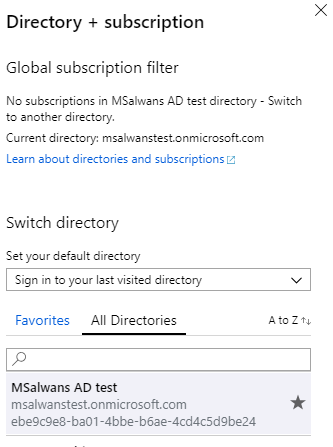
Creating a new AD will take about 1 to 5 minutes. Once its done, we can use the icon on the top bar to open a menu with all the directories that we have under our account and to switch to any of them:

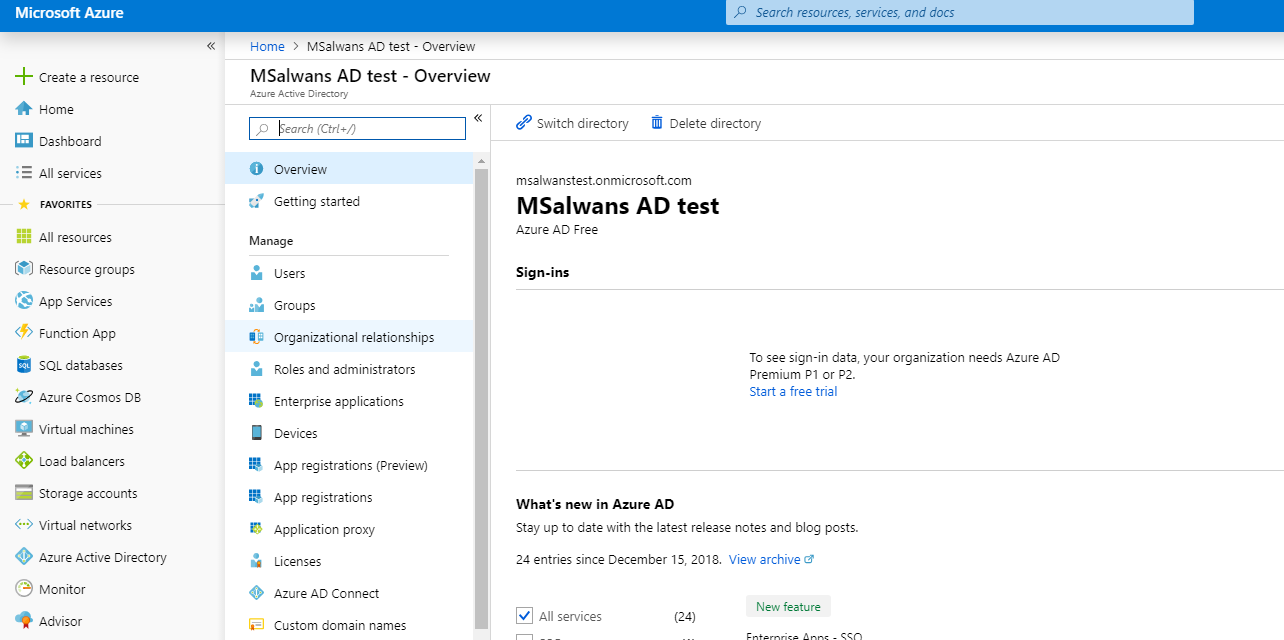
After switching we can navigate to the active directory page by selecting the “Azure Active Directory” option from the side menu on the left:
Login Flow
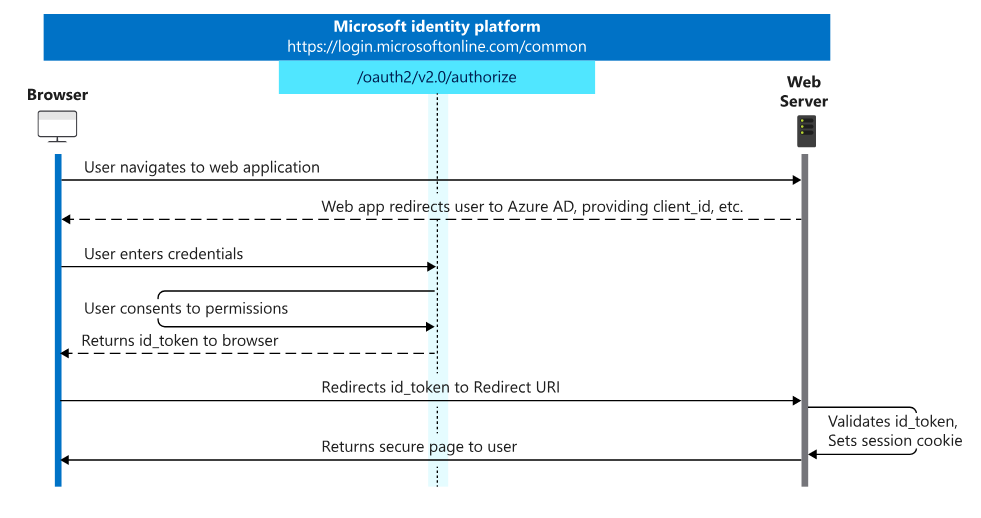
Without going into details, the below diagram shows the steps performed to authenticate a user. The first thing we notice here is that the user will be redirected from our web app to an external login form. Next, the user will enter their credentials and they will be validated against the Azure AD. Finally, the user will be redirected back to our web app with an authentication cookie.
Generating the .NET Core Template
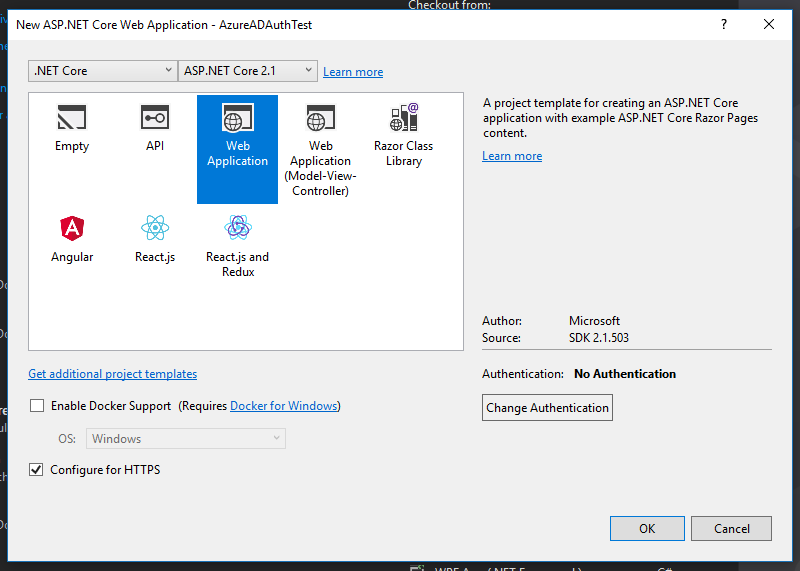
To create our secure web app in Visual Studio, we go to File -> New -> Project and make sure to select “ASP.NET Core Web Application” as shown below and then click OK:

The following window is important as here we will select the authentication type. First, we will select “Web Application” with Core 2.1 and we must have “Configure for HTTPS” checked as below. Then, we click the “Change Authentication” to tell Visual Studio what type of authentication to use and which template to generate for us:
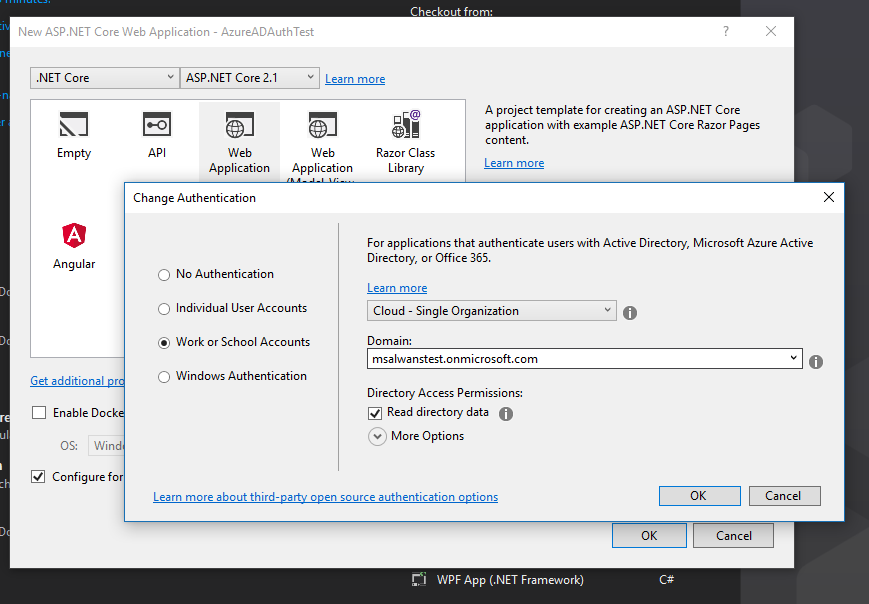
Here we will select “Work or School Accounts” and from the Domain dropdown we can select the active directory we created in the first step Then check the “Read directory data” option so Visual Studio can retrieve all the needed tokens and ids for us from Azure. Finally, we click OK twice to create the new project.
Note the Domain dropdown list is auto populated because this Visual Studio is registered by the same email I used to create the new Azure AD instance. If it is different, we would have had to enter the AD domain address manually:
Testing the New Web App
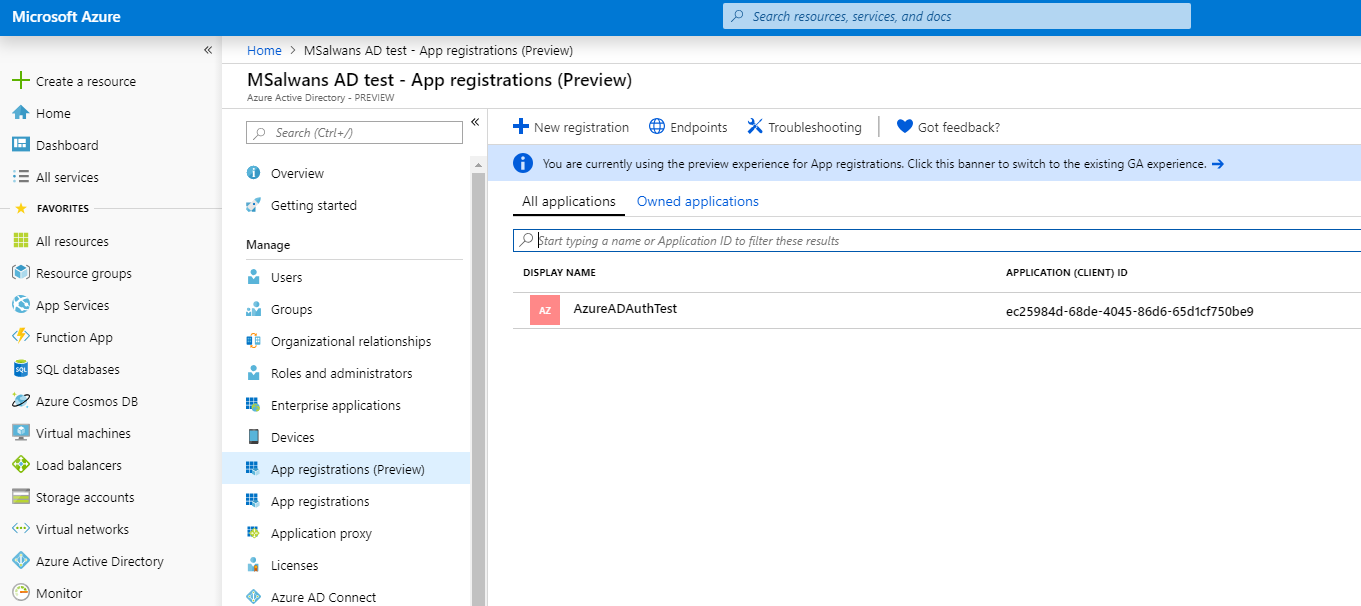
Before running our new app we want to make sure that Visual Studio registered this new app in Azure AD on our behalf. To do that we go back to active directory page in Azure portal and select “App registrations” from Azure AD menu. We will be able to see our web app listed with its clientId:
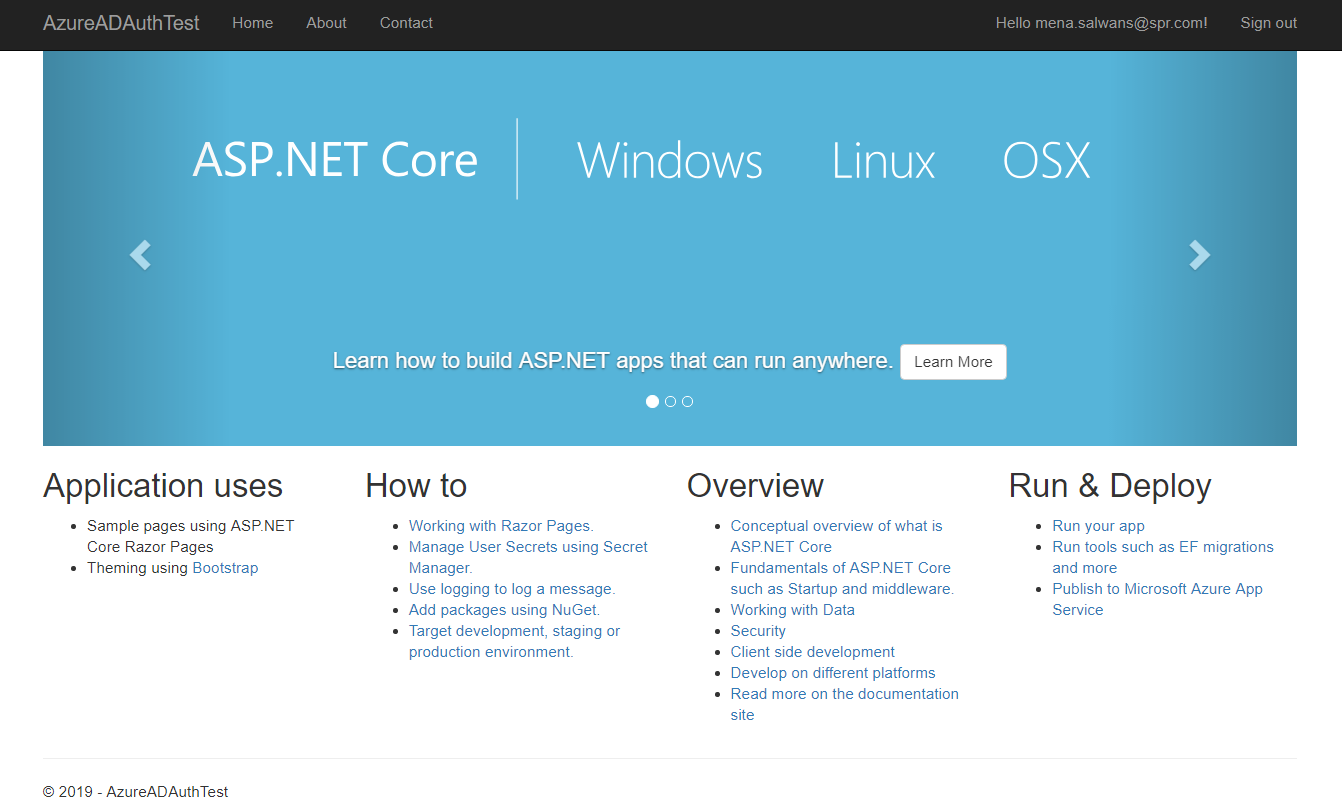
Then we run the app from Visual Studio in debugging mode. If it’s the first time we will be logged in automatically to test the login functionality, we can log out and redirected to the following page:

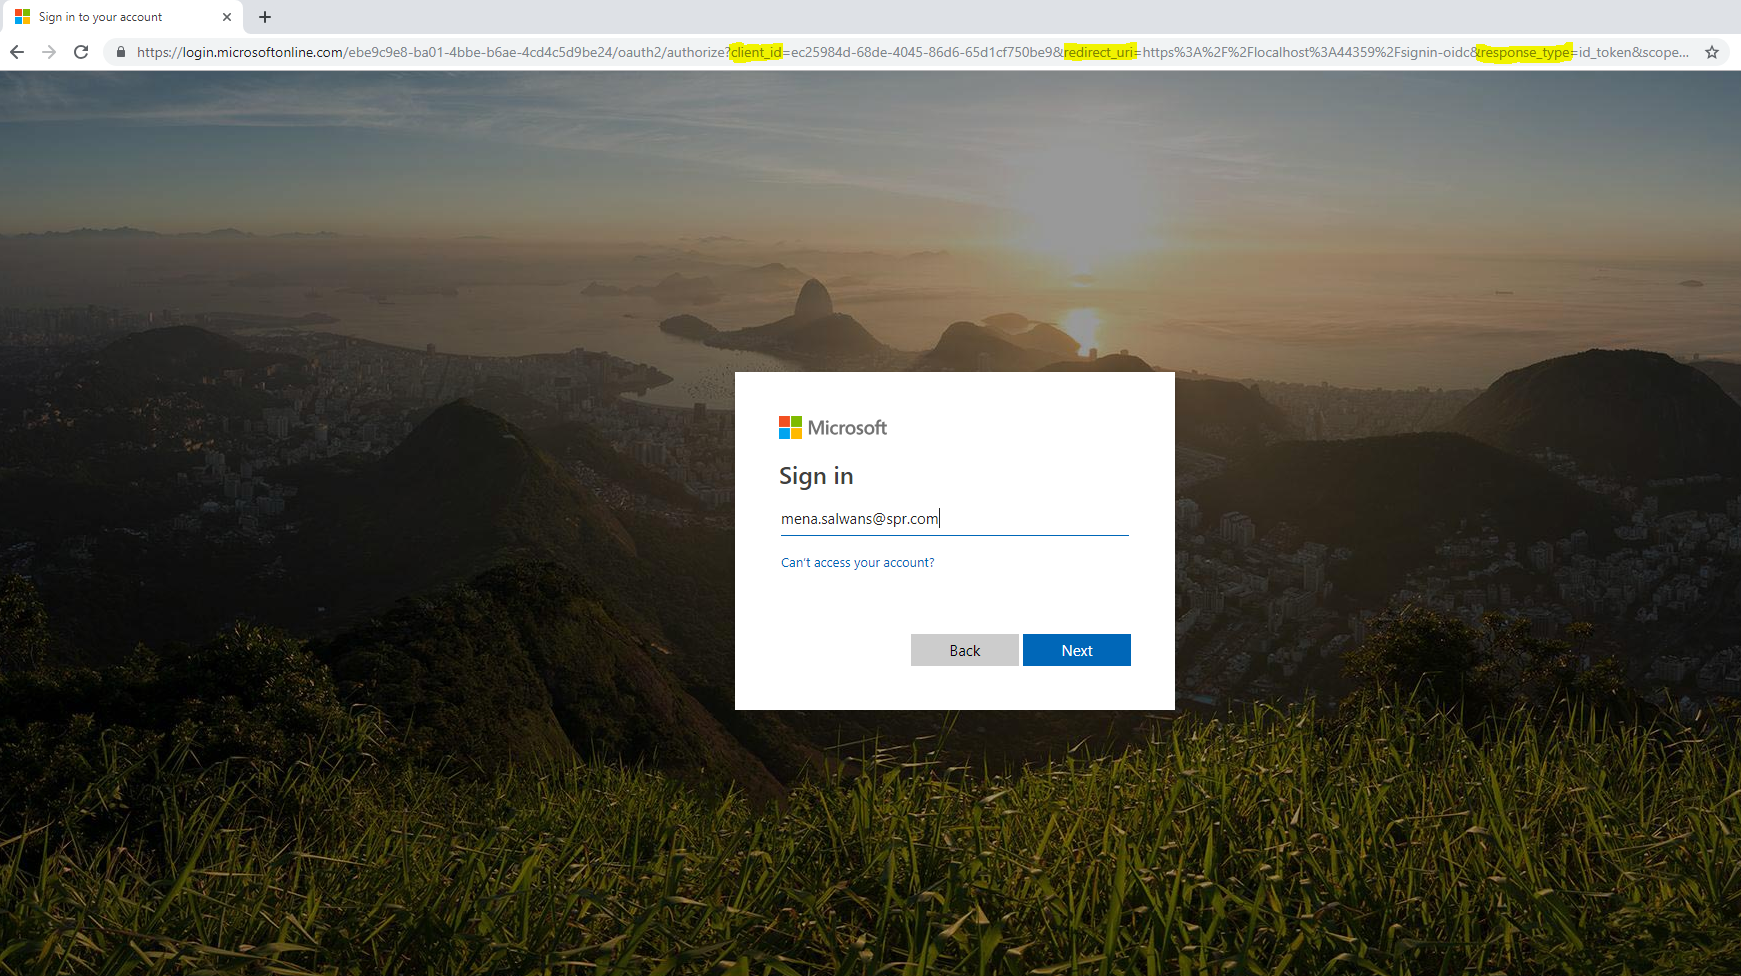
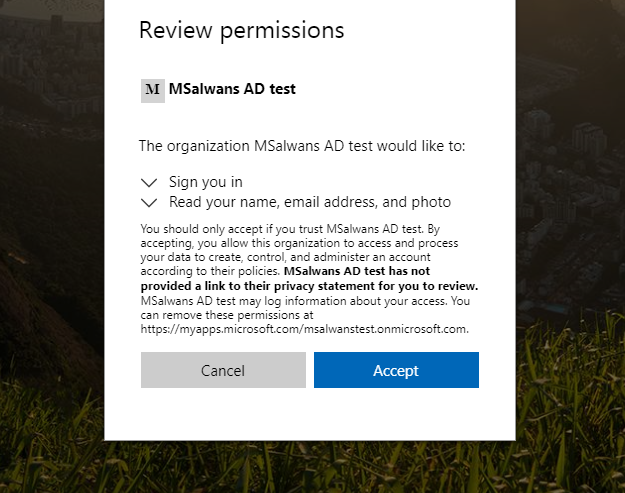
From here let’s click “Sign in” to get redirected to the login page. From the url, we can see that we have been redirected to an external login form https://login.microsoftonline.com and we can see that the url include our web app information: the client_id, redirect_url and other parameters.
Note: if this is the first time this user login to our web app the user will be asked to allow the web app to retrieve their information from Azure AD:
Behind the scenes
Now we will see what information has been exchanged between Azure and our web app and what code was used to perform this authentication and also how this can be changed to match different requirements.
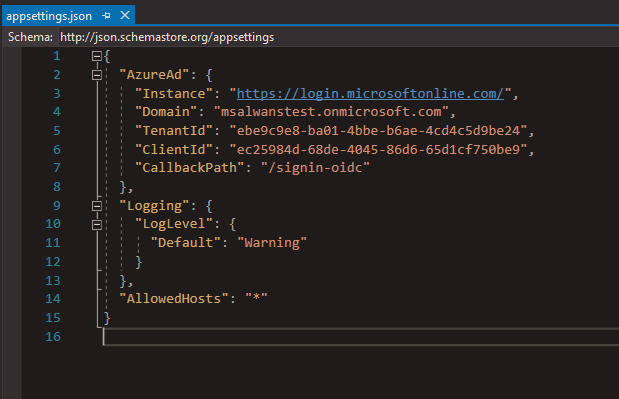
Before taking a look at the code, let’s see what configuration we need to integrate with Azure AD. In our case Visual Studio did all the work for us and retrieved this information and stored it in appsettings.json.
Inside the appsettings.json file of our web app, we can find the domain name that we created before and its TenantId, both of which are unique and identify our AD instance. Also we can see ClientId which uniquely identify our web app. Finally, there is CallbackPath which tells Azure which route to redirect back to once authentication has completed.
Login flow in details
If we go back to the Identity platform diagram, we see that the user is redirected to Azure AD with ClientId, TenantID, callbackPath as redirect_url, and a token. Once the user is authenticated, Azure will respond with id_token or Jwt that we can validate using the app middleware and then give the user an authentication cookie that will keep the user logged in.
Authentication code
All the code that has been generated for us can be found in Startup.cs. Once we open it and check the Configure(…) method we can find that we have app.UseAuthentication() middleware added, which will check each request and use the app service to authenticate users. This service will be configured in the ConfigureServices(…) method, and as we see below Visual Studio has generated this authentication service on line 38 and specified AzureADDefaults schema to be used here. Additionally, the method has passed “options” which has all Azure’s configuration from appsettings.json.
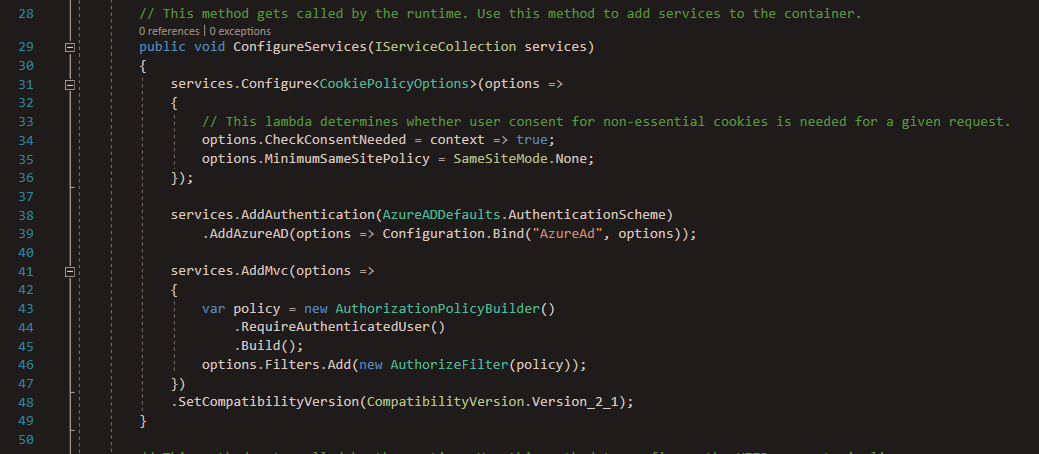
At this point the AddAzureAD service will use OpenId Connect behind the scene to authenticate users and convert the token or Jwt from Azure AD to an auth cookie that will be send to the browser. Finally, we see that this template has a policy defined on line 43, which was added to protect any resource inside our web app.
We saw how easy it was to generate this template and to secure a basic web app without coding it from scratch or spending time on security research as the .NET Identity platform is reliable and up to date. Although there is still some additional code needed to be able to generate a bearer token to secure any API in our web app, but no doubt that this template can be a good boost when starting a web app that services Azure AD users.