Use Logic Apps EDI batching to group multiple transactions

In the world of electronic data interchange (EDI), you will run into a situation where you must group your EDI transactions into a single batch transaction. In this blog, we will show how to build a quick batching solution using Logic Apps.
One of the challenges that developers face is how to build a solution that will be re-usable for all their trading partners. This post will provide one example of how to handle this by building a batching solution.
For this solution, use the following:
- A new resource group
- Integration Account
- 810 and 856 schema
- Contoso Partner Profile
- Northwind Partner Profile
- Contoso to Northwind agreement
- Logic App to send individual messages to the batch
- Logic App to batch individual messages
- Postman to trigger the workflow
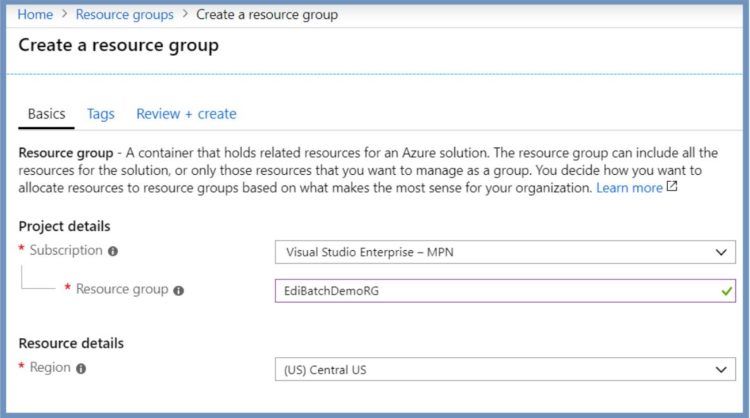
Create Resource Group
Create the resource group for your solution.
Click Resource groups ->Add -> and name the resource group EdiBatchDemoRG -> Review + Create -> Create
Create Integration Account
Create the Integration Account that will be the container for our EDI related artifacts.
Go into the new EdiBatchDemoRG resource group that was just created. Click Add -> search for “integration account” -> Create
Set the fields as follows:

Configure Integration Account
Configure the Integration Account by adding the schemas, trading partners and agreement.
Select the integration account and go into Schemas to add the schemas; we will use the EDI 810 and 856 schemas.
Upload the xsd files from our local file system.


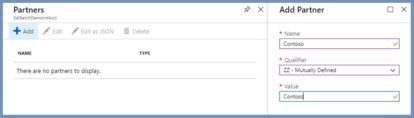
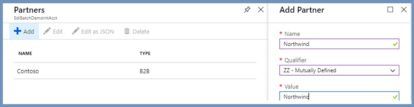
Now go into Partners and add a partner for Contoso and one for Northwind as follows:
Setup an agreement
Create an agreement between the two partners you created in the previous step. You will only setup an agreement for outbound (or sending).
To create an agreement, select Add.
Setup the host and guest partner as follows:
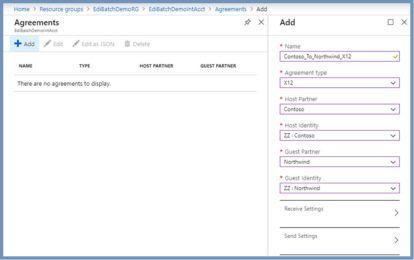
In the Send Settings, add the 810 and 856 schemas and hit OK to save your changes.
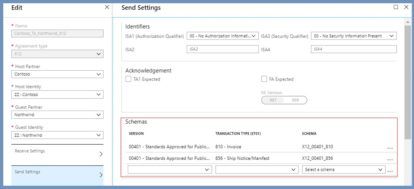
Your integration account should now contain two schemas, two partners and one agreement.

Logic App to Create the Batch
First, build the Logic App to create the Batch. You must create this first as this will be called from your message sender Logic App.
From the Azure Portal select Create a resource -> search of “Logic App” -> click Create button.
Create with the following:
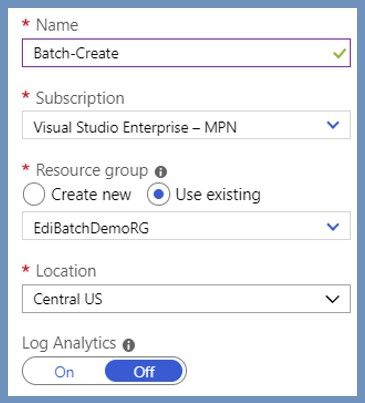
You will get a notification, then click Go To Resource. Otherwise, you can go to the resource group link on the left, go into the EdiBatchDemoRG resource group, and find the Batch-Create Logic App.
The first time you launch or edit the Logic App, you are presented with templates. For this Logic App, select the Blank Logic App.
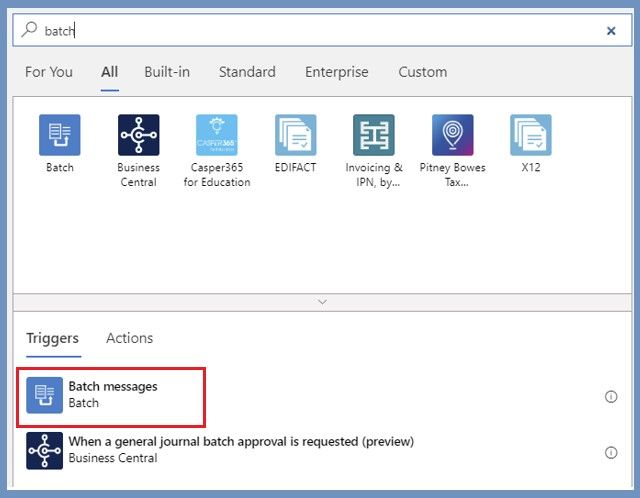
All Logic Apps consist of a trigger and one or more actions. For your trigger, search for “batch” and select Batch Messages.
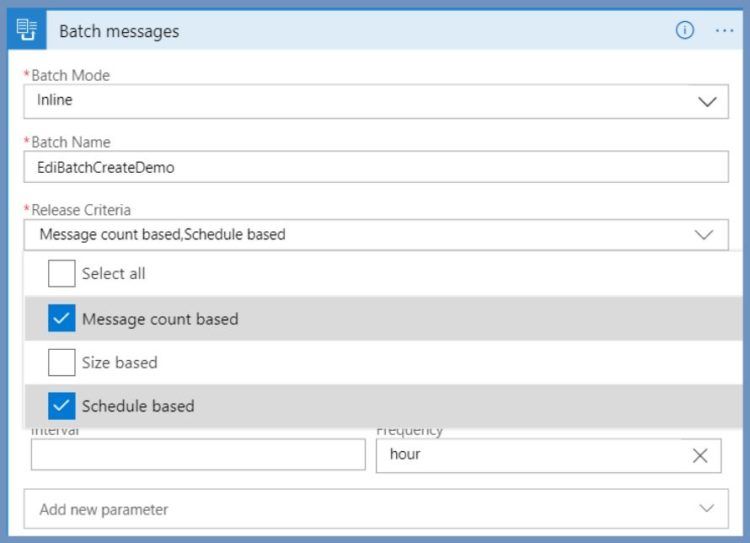
Set the following:
- Batch Mode: Inline (you can also set this in the integration account, which is for the release criteria)
- Batch Name: EdiBatchCreateDemo
- Release Criteria: Select Message count and Schedule based. Set message count to 2 and schedule to interval of 10 minutes. These options will release and create a batch when two messages are received or 10 minutes have elapsed.
Save the Logic App and close the blade. Go into Workflow Settings, in the left pane under Settings. Under Integration account select the EdiBatchDemoIntAcct. This will allow this Logic App to access any of the artifacts in this integration account. Save the setting.
Go back and edit the Batch-Create Logic App so you are in the designer. Search for the X12 connector and select the Batch Encode X12 Messages Using Identities.
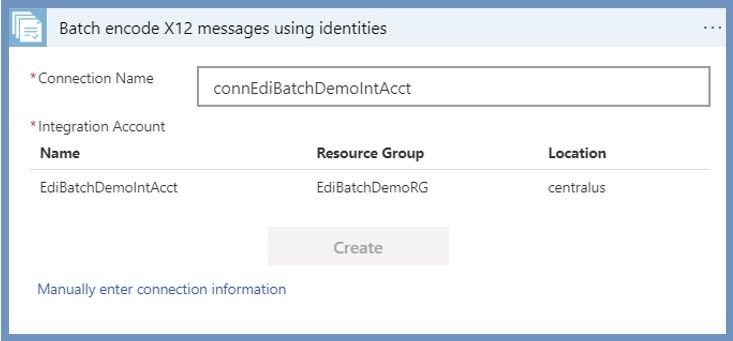
Since this is the first time you are connecting to the integration account, it asks you to create a connection. Select your integration account and create the connection as follows:
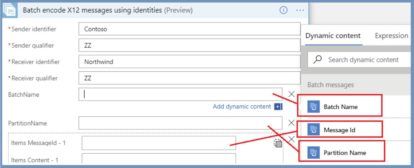
Add the BatchName, PartionName and Items parameters and set the values:
- Sender identifier: Contoso
- Sender qualifier: ZZ
- Receiver identifier: Northwind
- Receiver qualifier: ZZ
- BatchName: Batch Name (from dynamic content)
- PartitionName: Partition Name (from dynamic content)
- Items MessageId – 1: Message Id (from dynamic content)
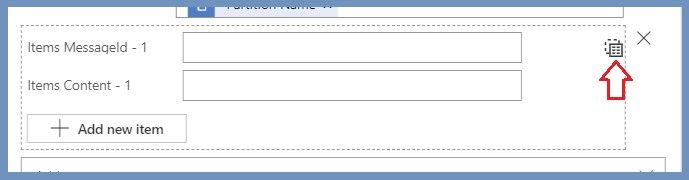
Click the icon to get only the items parameter. Select the batched items dynamic content.
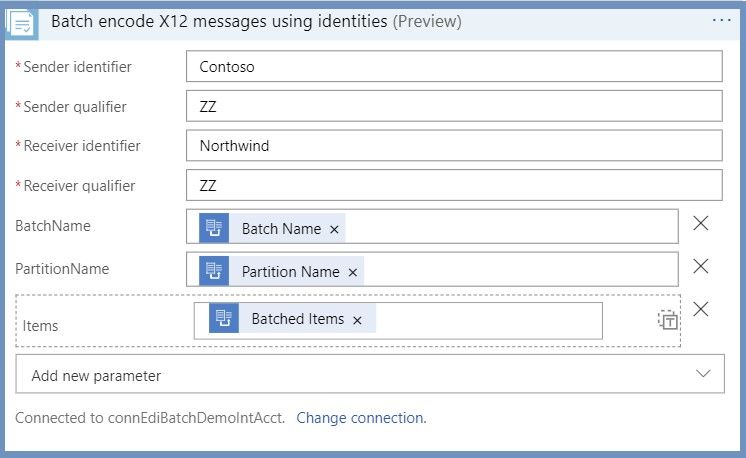
Your batch encode should look like the following. Save the Logic App.
Logic App to Send EDI Messages To Be Batched
Create a new Logic App that will receive an http request and send the individual messages to the batching Logic App.
Add a new Logic App in the resource group with the following:

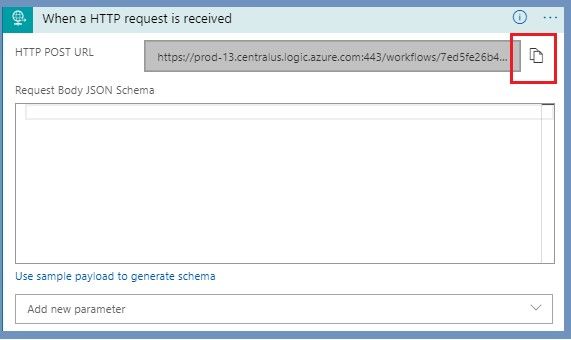
When your Logic App is provisioned, select the When a http Request is Received. This will add the trigger for you.
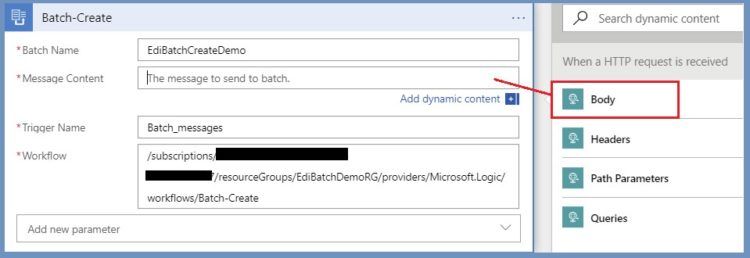
Add an action, search for “batch”. Select the Batch-Create Logic App we created earlier.

Fill the parameters as follows and then save and exit.
- Batch Name: EdiBatchCreateDemo (must match the name in Batch-Create Logic App)
- Message Content: Body from http request
Test the Batch Solution
Use Postman to send your EDI messages to your Logic App.
To setup you will need:
- The Logic App url
- 810 or 856 xml payload
To get the Logic App url, edit the Batch-Sender Logic App to open it in designer mode. In your http trigger, click the copy button to copy the url.
For the xml body use an existing 810 or 856 from your environment. You can also generate a schema in Visual Studio if you have the BizTalk SDK installed, or you can use an xsd to xml online tool.
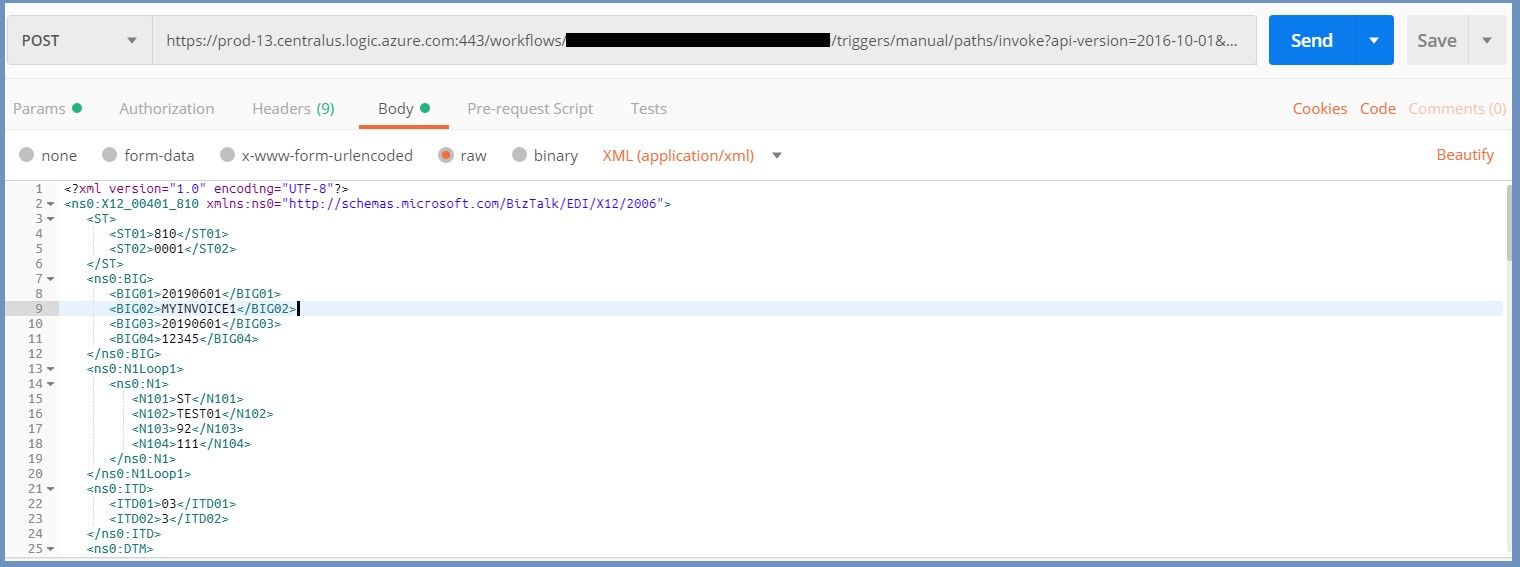
Fill out the Postman as follows:
- Set action to POST.
- Enter request URL box to URL you copied from your Logic App.
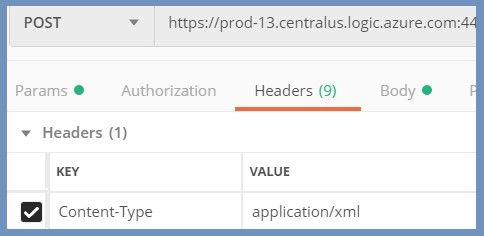
- Under Headers, add Key for Content-Type and Value of application/xml.
- Under Body, click Raw radio button, and paste your 810 xml in the text box.
Recall in your Batch-Create Logic App, you have the message count set to 2. In order to trigger the Batch-Create Logic App, you will have to send two messages.

In Postman, hit the Send button two times. You should see two instances in the Batch-Sender Logic App run history: one for each message, and then one instance for Batch-Create.

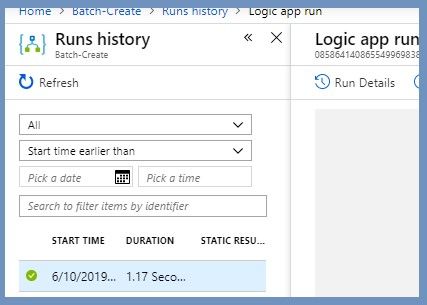
Open the run history for Batch-Create. As indicated by the green check marks, each step ran successfully.
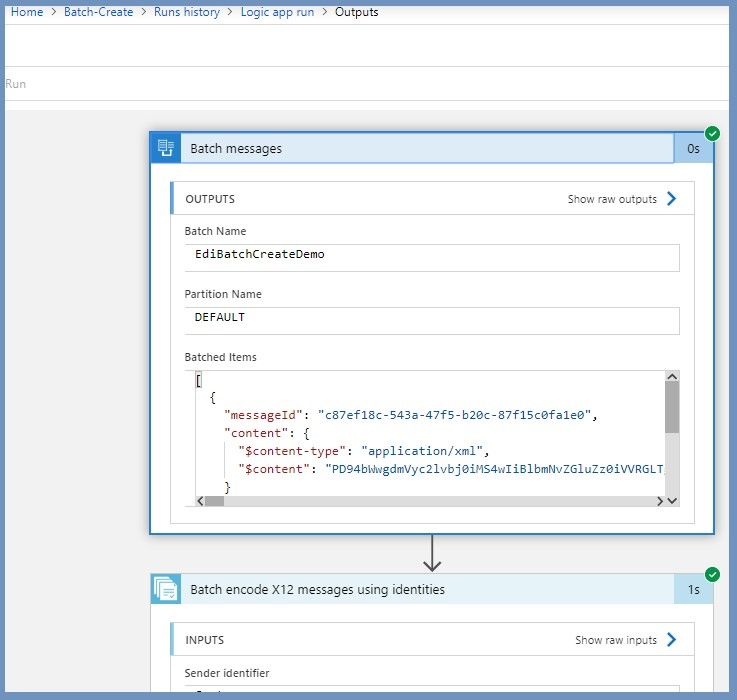
To see that the Batch-Create Logic App created a batch envelope for your two messages, open the Batch encode X12 messages using identities action. In the outputs section, copy the $content json property.
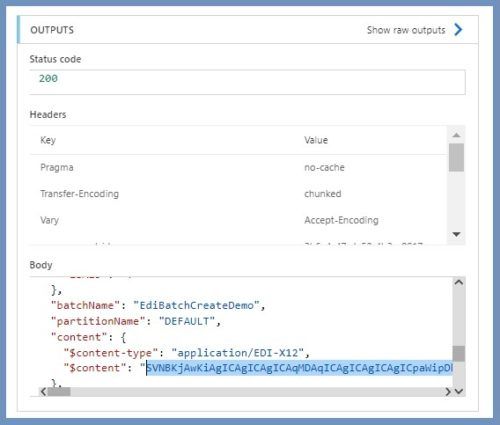
This is Base64 encoded, so go to https://www.base64decode.org/ and paste the content to decode and retrieve the EDI envelope.
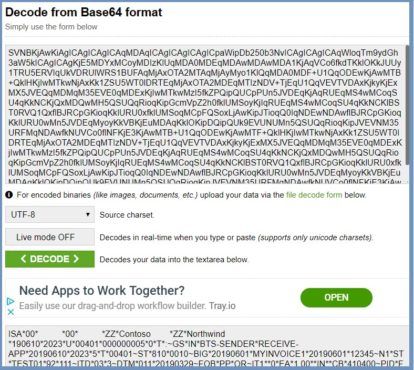
Paste the output of the decode into a text editor and search *ST. You should find two matches. Or you can create a *.edi file and open it in EDI Notepad to see the two ST segments.
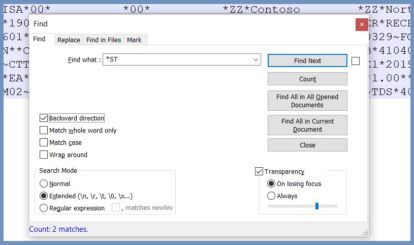
And there you have it. You sent two separate EDI messages and set up your batching process so upon receipt of the two messages, the batch was released. This created a single EDI Envelope containing the two messages in a single batch transaction.
In a future blog, I will show how you can modify this solution to dynamically create separate batches for each Trading Partner and document type. Stay tuned!