How to Set Up an AutoML Process: Step-by-Step Instructions

Let’s begin by answering the question: What is Automated Machine Learning, or AutoML? AutoML is the process of automating the tasks that are most time consuming in the machine learning (ML) process, namely preprocessing the data, feature engineering, and hyperparameter tuning.
AutoML is not AutoDataScience or AutoBusinessDecisions. The tendency to view AutoML as the black box oracle of knowledge needs to be resisted. Machine learning is already considered a magic black box to many. The use of AutoML can be thought of as putting the machine learning black box into the AutoML black box, and then trusting that black box to provide insight into the future. Without an understanding of how and when to use these tools for your business, you might as well save yourself time and money by using the Magic 8-Ball, instead.
Machine Learning Pipeline
In 2016 researchers at the University of Pennsylvania wrote a paper on their work using a tree-based machine learning pipeline optimization tool (TPOT), which is now an open source Python project. You can find information about that project here.
 “Evaluation of a Tree-based Pipeline Optimization Tool for Automating Data Science.”")
The diagram above from that paper represents the machine learning process and which of those steps AutoML tries to automate.
75% of machine learning is preparing to do machine learning…
and 15% is what you do afterwards.
– Rich Caruana, ICML 2015
Because so much of the work (75%) is carried out in the grey box above, AutoML can help bring efficiencies to the process which allows a business more time to use the results and refine decisions.
Azure Automated Machine Learning
Azure Automated Machine Learning appeared on the scene in 2018 and has been evolving rapidly since then.
At a high level Azure AutoML looks like the following:
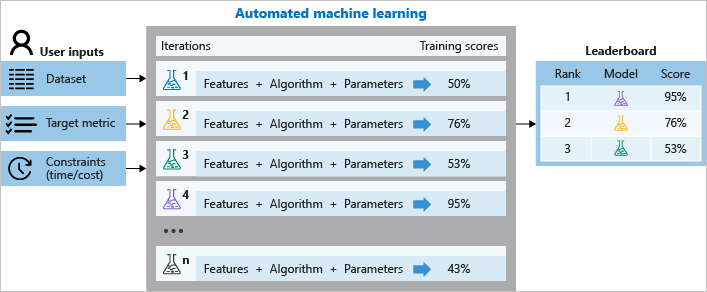
The user – typically a Data Scientist, Machine Learning Engineer or a Data Engineer – will curate a dataset and define the target metric that the business is interested in predicting. Constraints will be applied to balance the execution time with the execution costs.
Azure Automated ML will perform some automated feature engineering and then evaluate the training metrics using hyperparameter tuning across a number of different machine learning models. Machine learning models have different performance characteristics depending on the data. Therefore, engineers must test many different models to find the optimal model. This is where the efficiency of AutoML can help.
You can find a good technical overview of how Azure performs AutoML here. Read on for an example process and user experience as of March 2020.
Step-by-Step Example: Azure AutoML Bank Classification
For this walk-through, let’s use a dataset provided by Azure and based off a Kaggle competition. You can download the dataset from here. Here’s the description of the problem: “The data is related with direct marketing campaigns (phone calls) of a Portuguese banking institution. The classification goal is to predict if the client will subscribe a bank term deposit.”
Using Azure AutoML does require the use of Enterprise workspaces.
Start new Automated ML project
In the left nav, select Automated ML and then “New Automated ML run.”

Upload the Bank dataset
Select “Create dataset.”
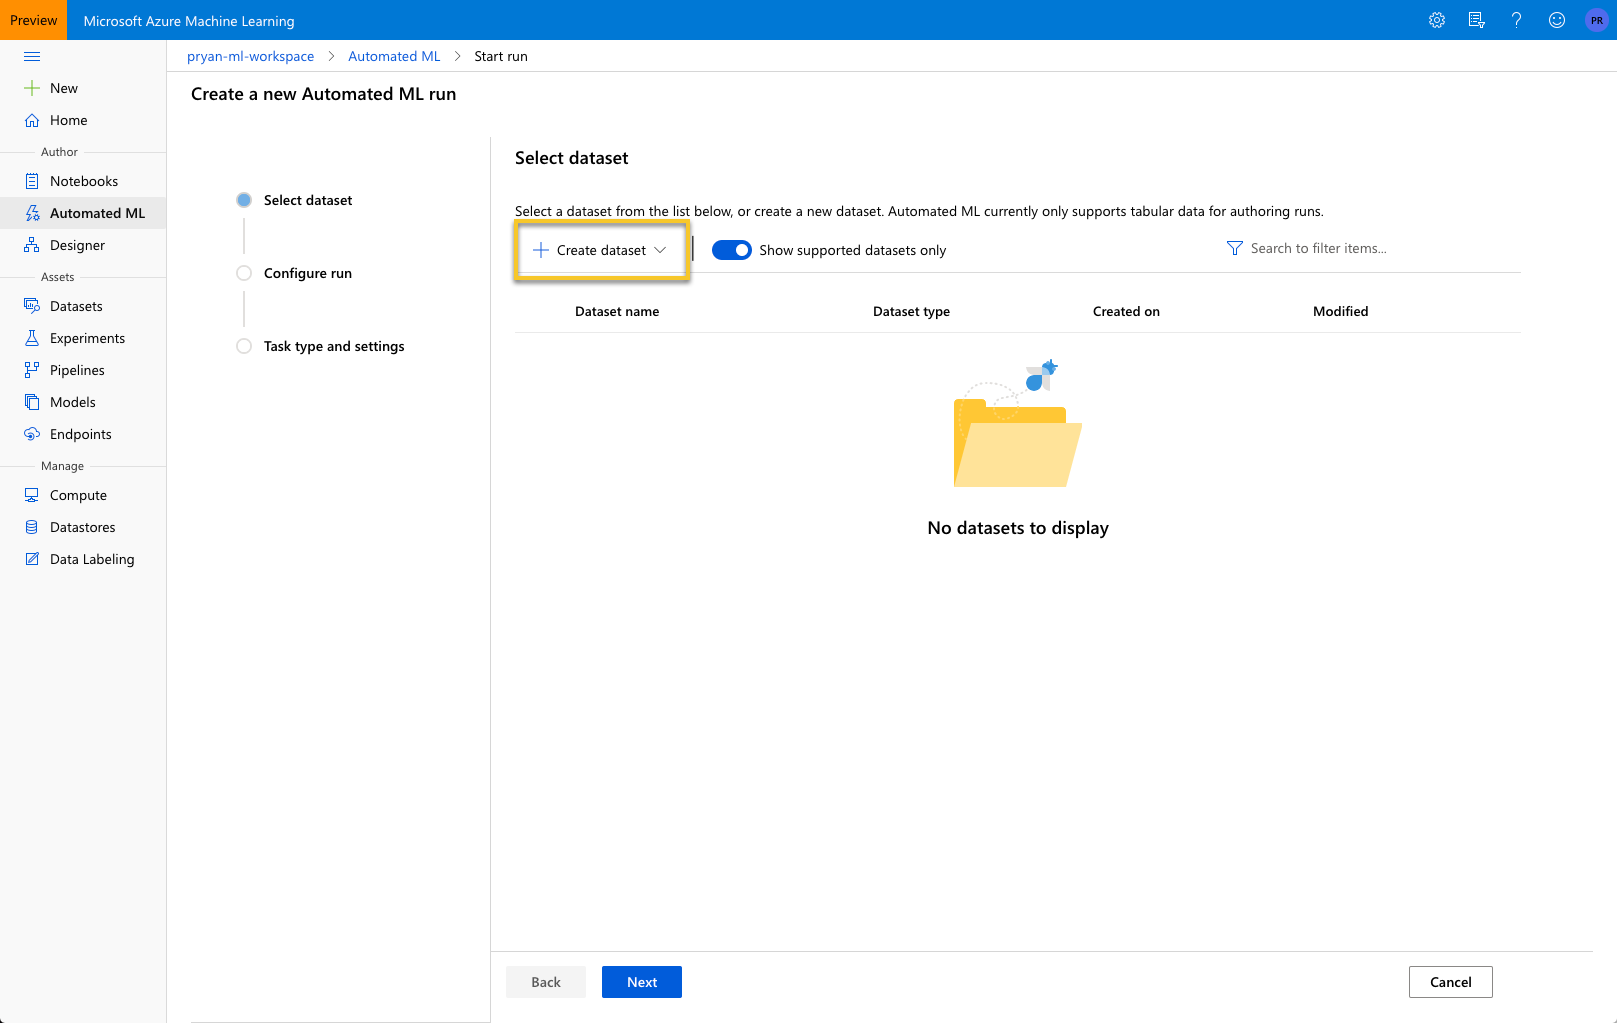
Most likely you will have Blob storage setup and available, so you can leave the “Previously created datastore” select. Select the browse button and navigate to the csv file.

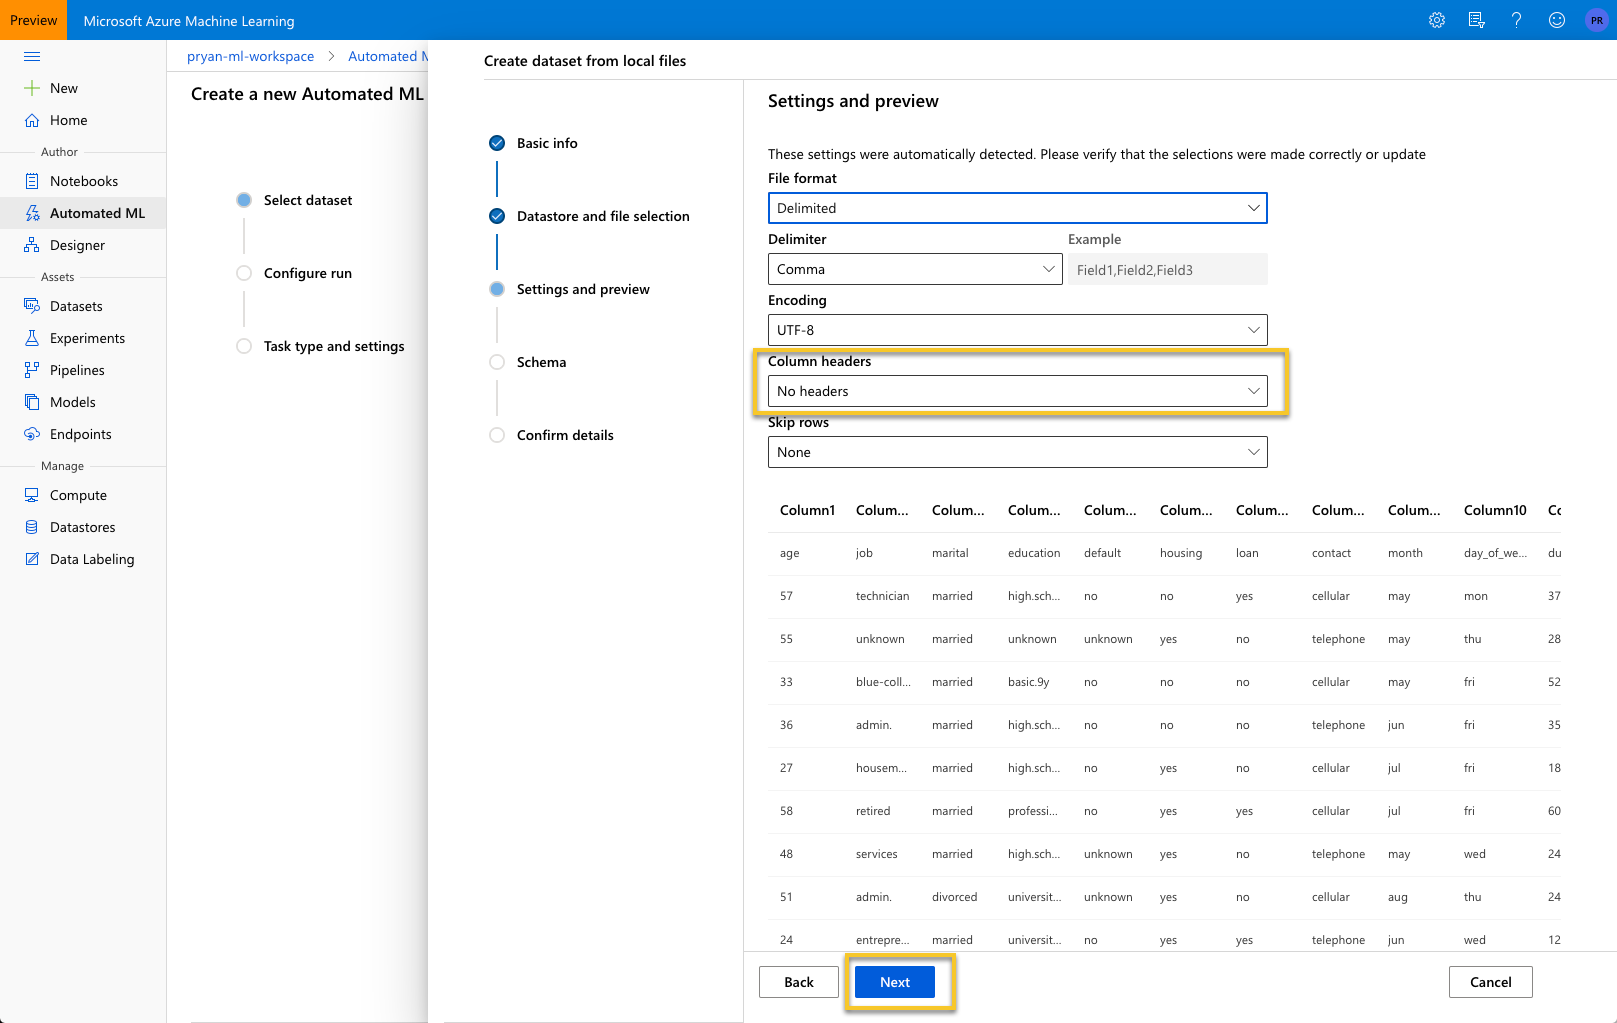
In the Settings and preview section, you will need to change the “Column headers” value from “No headers” to one of the last option and then press “Next.”
This screen gives you a chance to review the data.
The schema editor gives you a chance to change the type of decide to include or exclude certain columns. For this example, make sure “day_of_week” is not included and press “Next.”

Confirm the details of the data to import. Press “Create” to import the dataset and perform the settings and schema operations specified previously.

With the dataset selected and uploaded, we can configure the Run parameters.

Enter an experiment name. You will later be able to find this experiment from “Experiments” in the left navigation.
For “Target column” select “y,” which is the column you want to predict. This column indicates whether the person subscribed to a term deposit or not.
Finally, select “Create a new compute” to configure a target compute instance. This will likely take a few minutes to complete.

When that is complete, the screen should look like the following. Select “Next.”

Next we select the task type and decide on the settings for the AutoML to use.
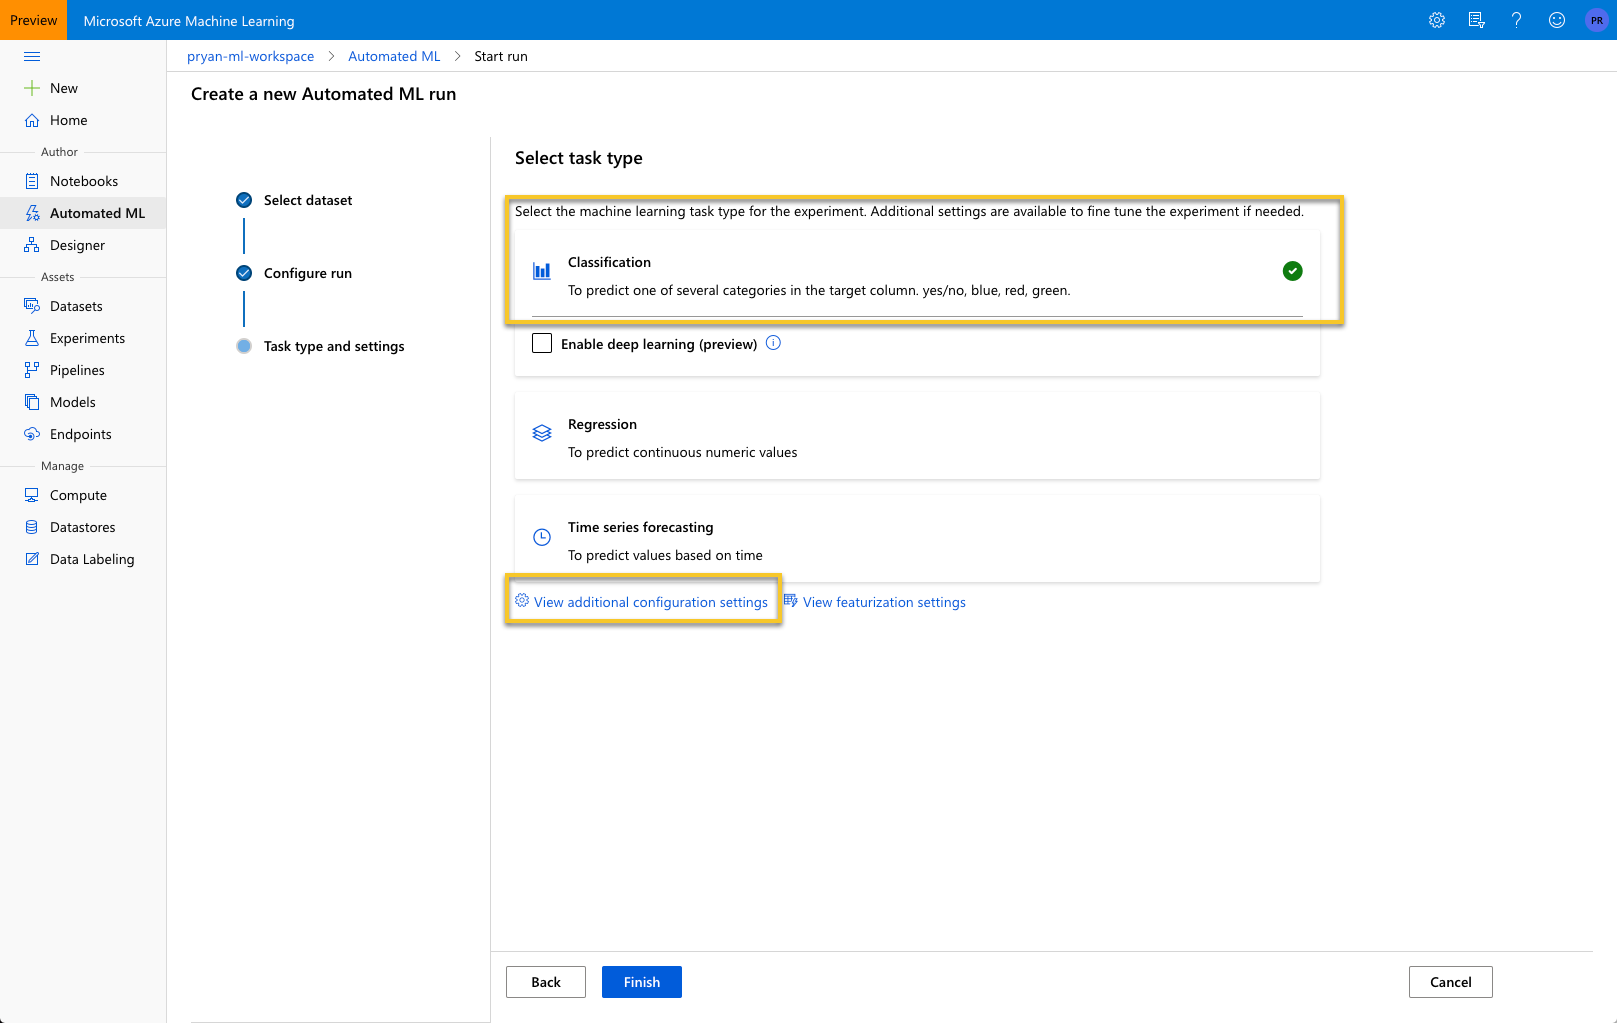
After selecting, “View additional configuration settings” you will see a screen like:
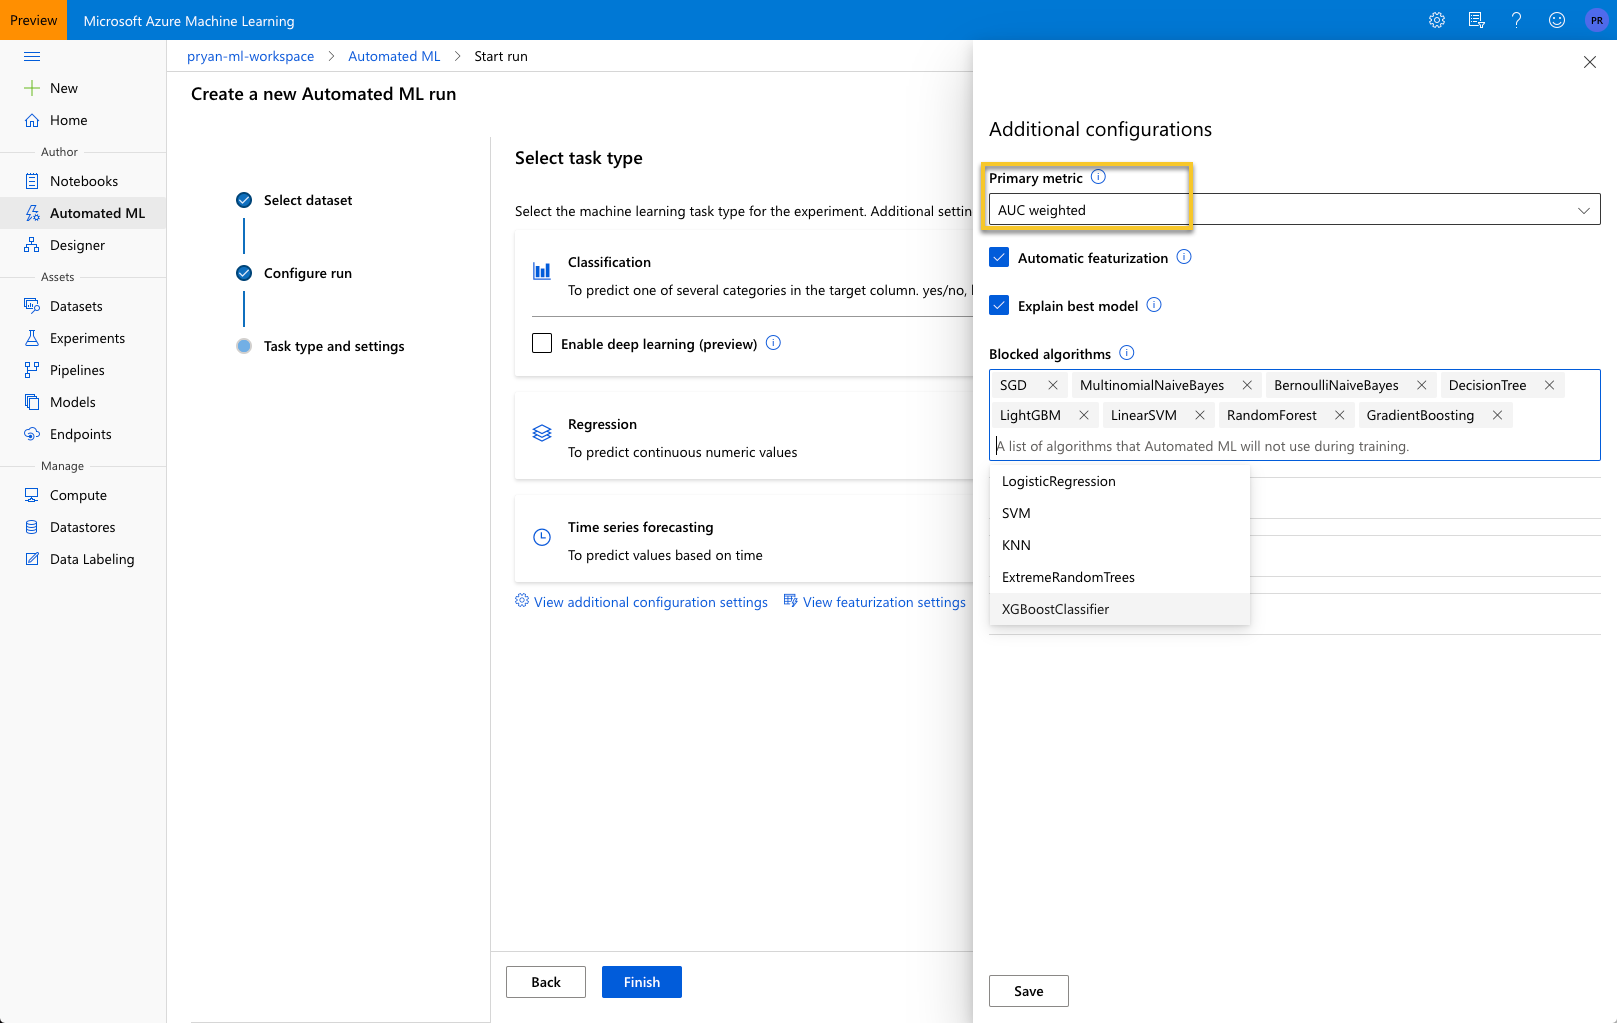
The Primary metric is default to Accuracy, but you can see from the dropdown there are a number of metric to choose from. For this example, select ‘AUC Weighted’. This metric is the Area under the Receiver Operator Characteristic curve (AUC ROC). Weighted is the arithmetic mean of the score for each class, weighted by the number of true instances of each class.
Blocked algorithms are those algorithms that you do not want AutoML to try. For this example, leave this blank so it tries all of the possible algorithms. There will be times however that you know some models are just not appropriate and you can save time by blocking those algorithms from being considered.
Open the Exit criterion and Validation sections. I would update these sections as shown below. The “Training job time (hours)” means that the AutoML training job will run for 1 hour as it attempts to find the best algorithm and parameters. You could also specify a metric score to use to cut the training short.
I selected “k-fold cross validation” as the validation type, but I reduced the “Number of cross validations” to 2 to speed up the process. Normally 5 and 10 fold cross validation is pretty typical, but it depends upon your dataset.

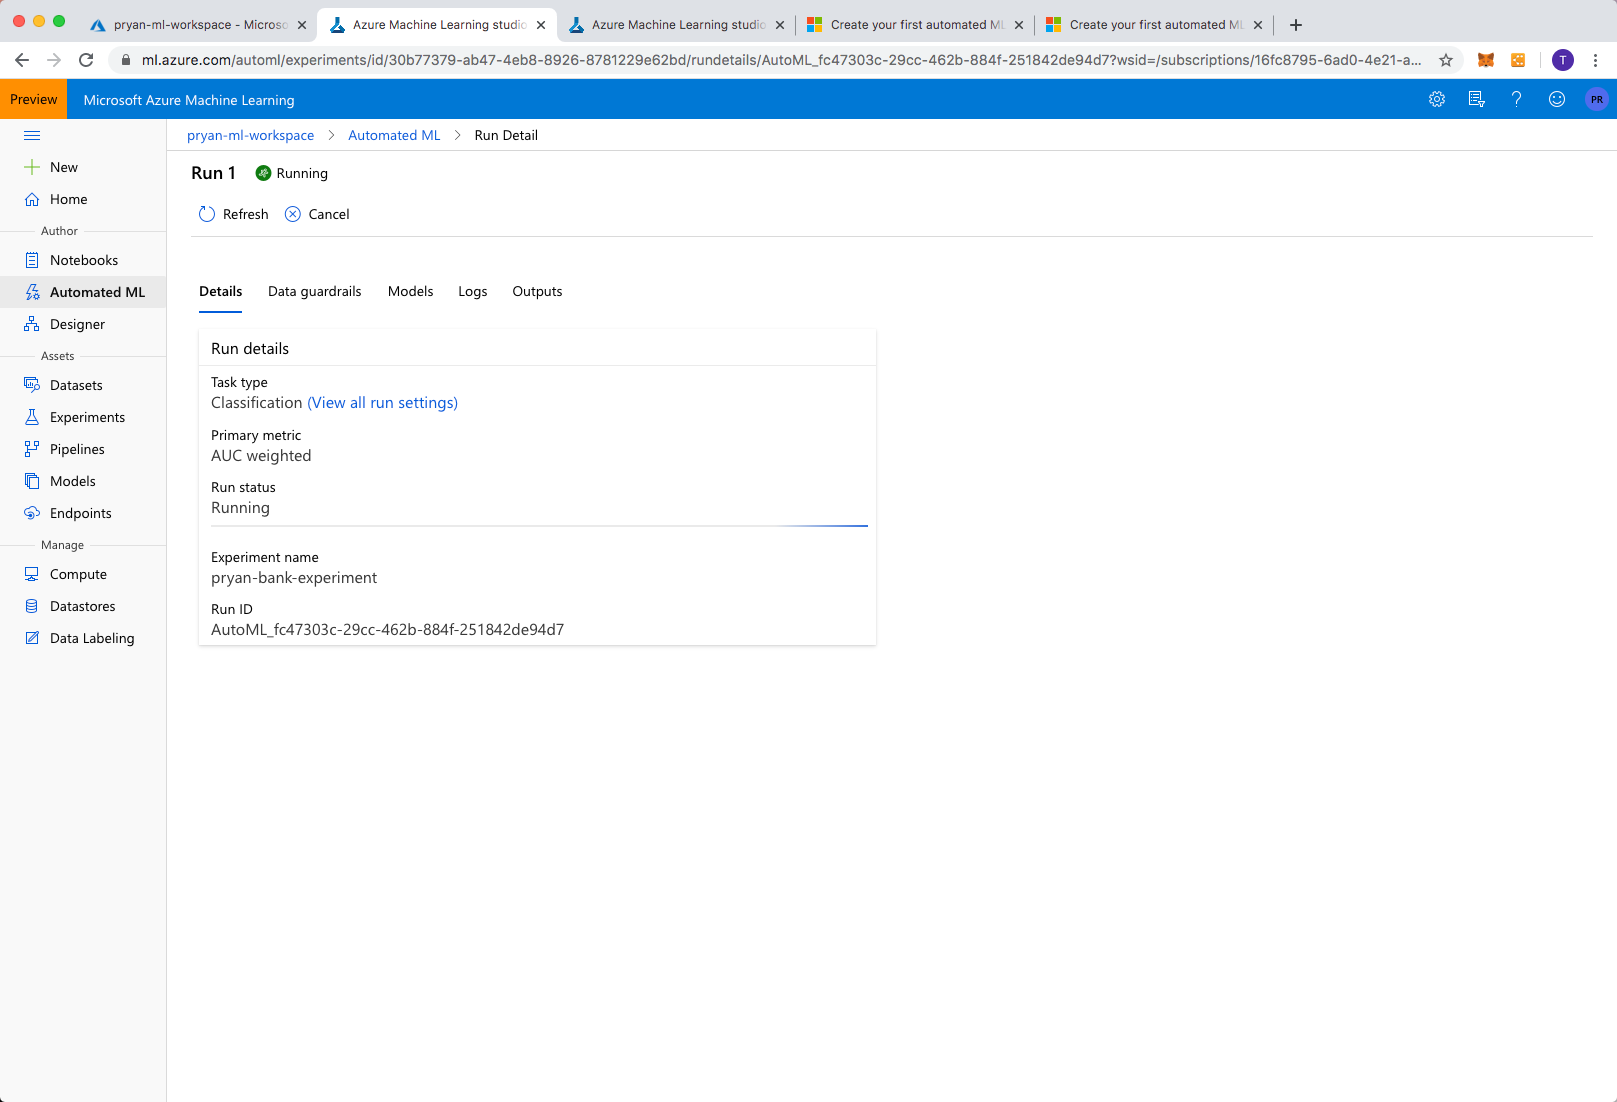
Select “Save” when you are done. This will start the AutoML process executing and you can see the Run Details.
When it is complete, the status will change to “Completed” and if you select the “Models” tab, you will see an ordered list of all of the models that AutoML considered.
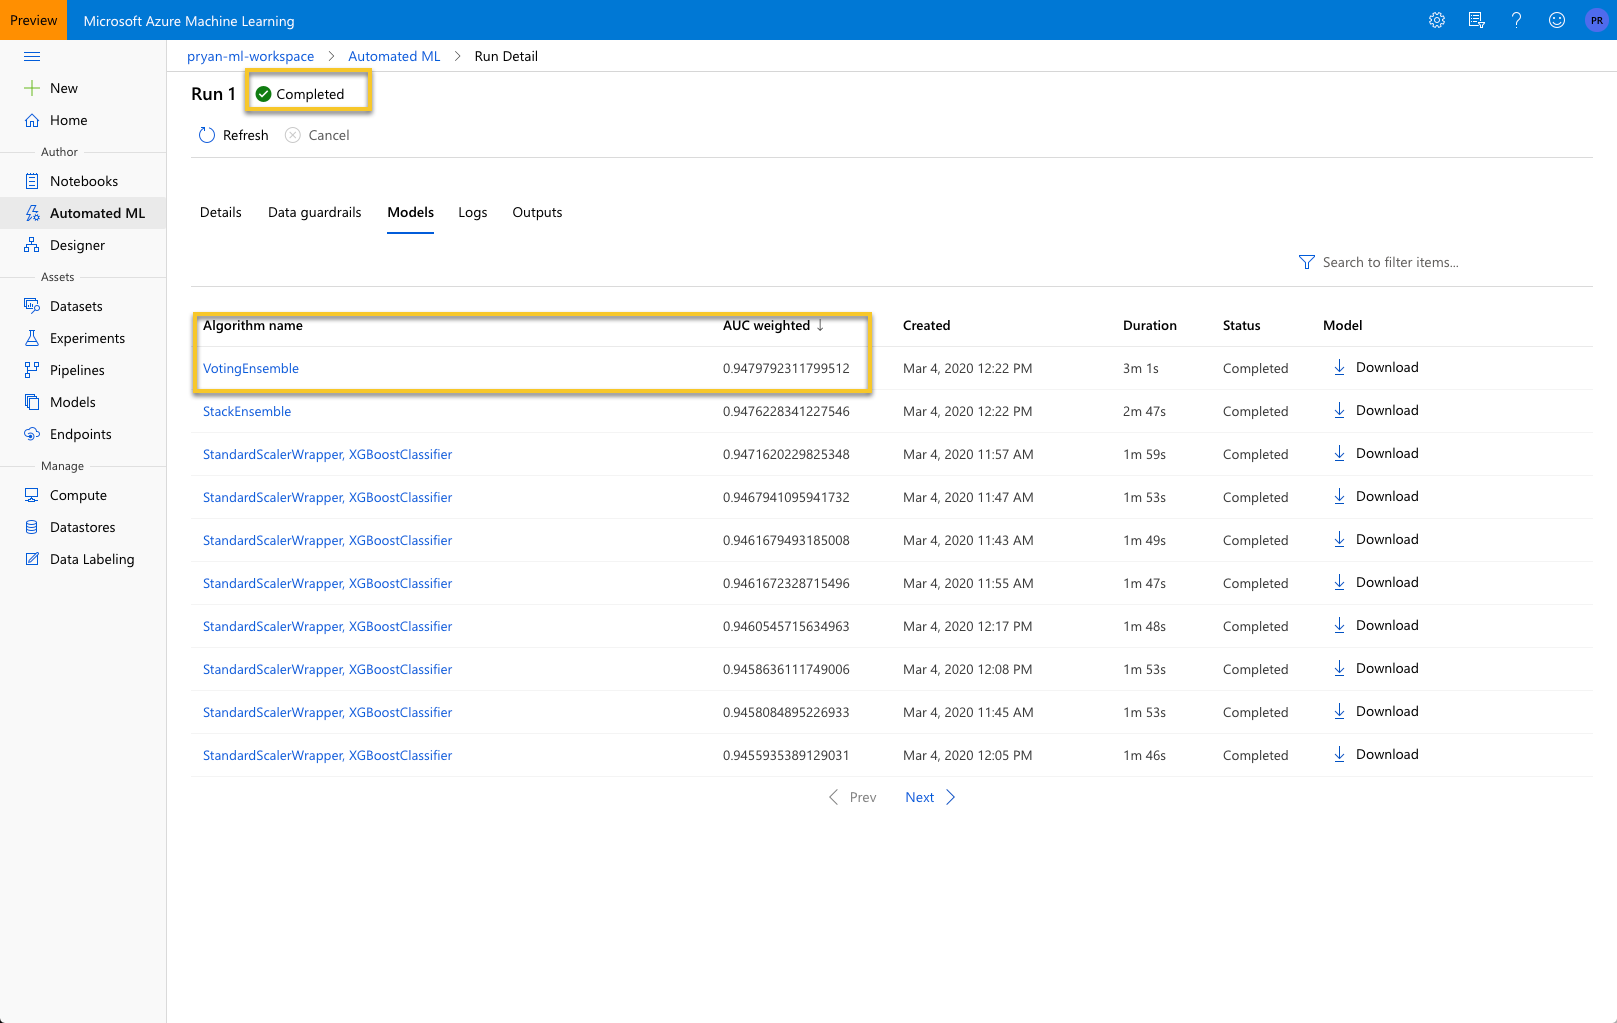
The VotingEnsemble algorithm was the best performing model. Did you anticipate that? Probably not, and this is where AutoML is really helpful. It will consider all of the algorithms – unless we block them – to find the best performing model.
You can select “VotingEnsemble: to see the model details.
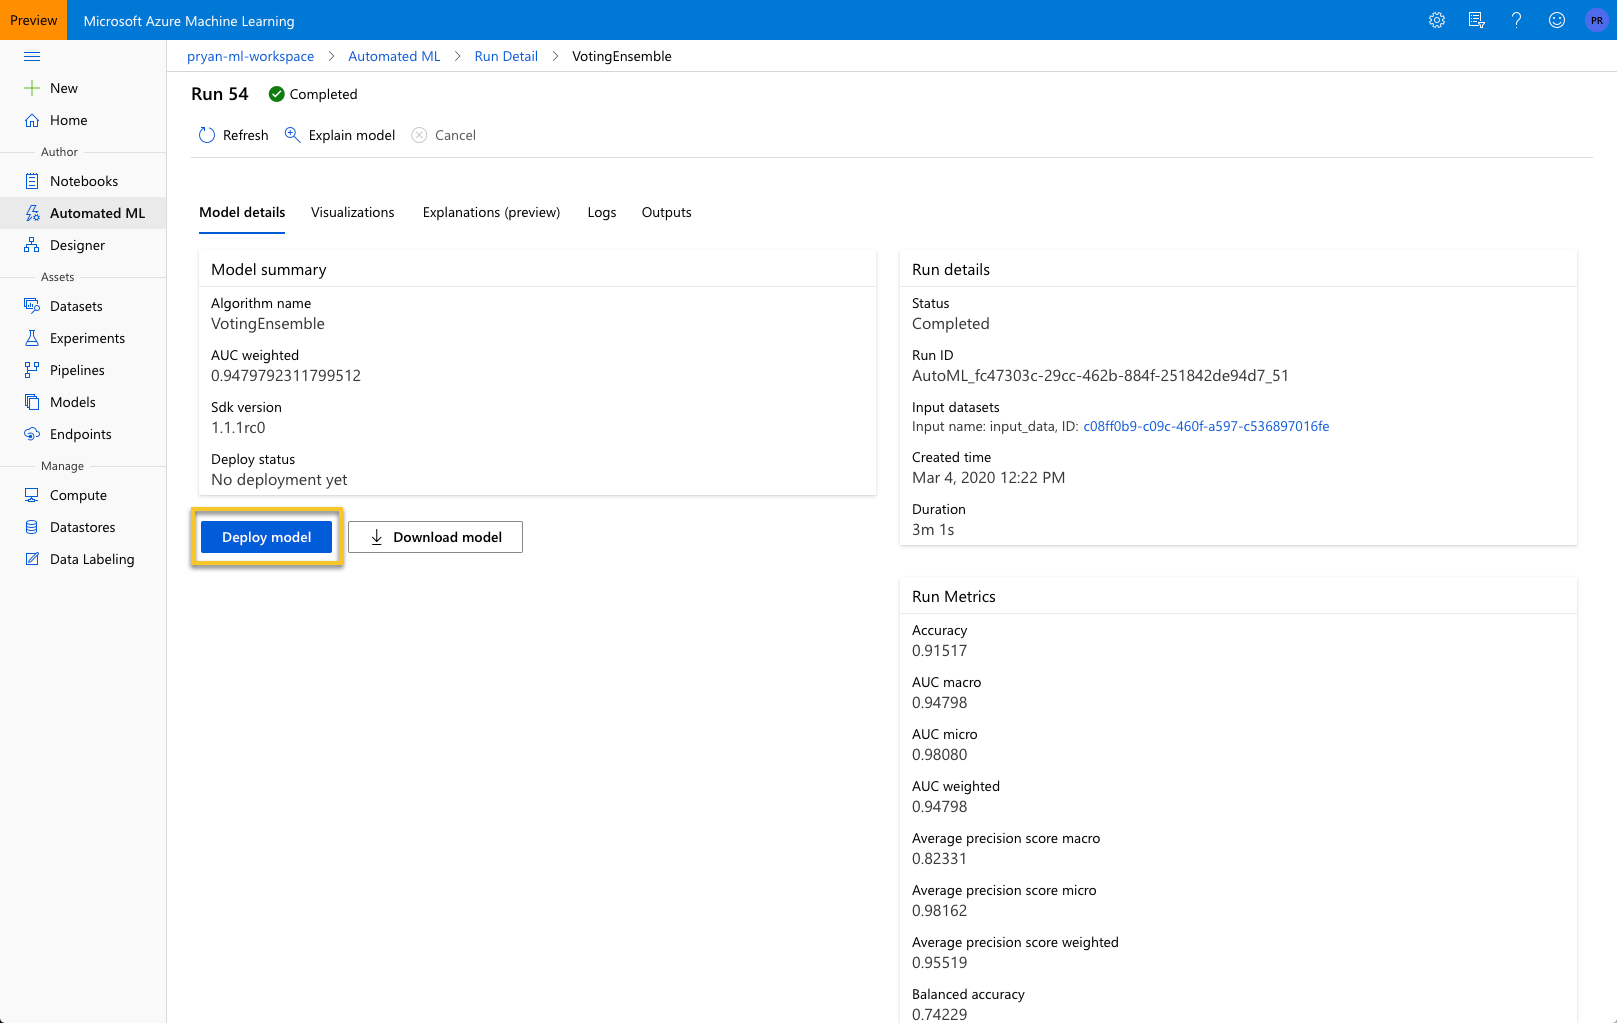
To Deploy the model to an endpoint that can be called remotely, select “Deploy Model.” This will bring up the panel below.

You will need to provide a Name for the endpoint. Once created you can find the endpoint from the left nav Endpoints. For this example change the Compute type to ACI ( Azure Compute Instance ). I like to Enable authentication as that will provide you with a key that must be included with the request.
Select “Deploy”
When that completes you can go to the Endpoints in the left navigation and select the endpoint you just created.
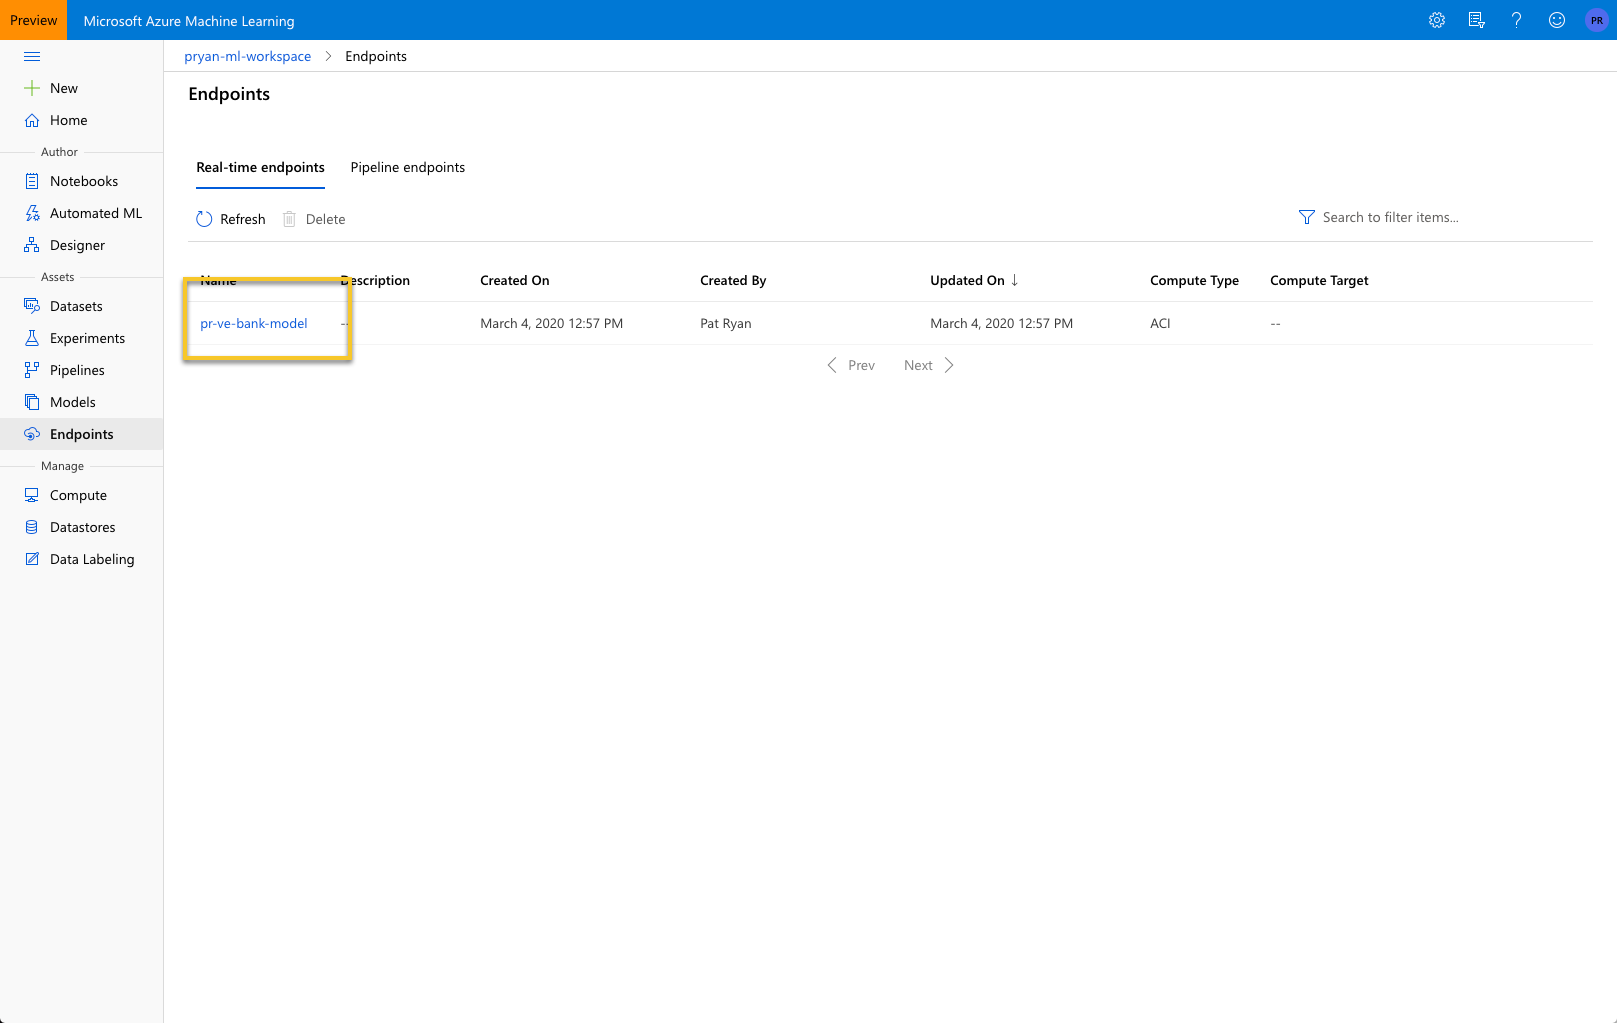
Select the endpoint will bring up details about the endpoint include the URL and the Key.
Using the URL and Key, I created a sample Python client that would read the data file and make predictions from random records. I do realize that testing with data you trained on is considered bad form. However in this case I wanted test the remote inference endpoint with data that I knew the answer. The Python script is below.
https://gist.github.com/b402956a71b3d297e6f8518bc081ef6b
The script will print the Expected value from the local dataset and the prediction made by the deployment model endpoint.
Conclusion
Automated Machine Learning is a powerful tool in the Data Science toolbox. Like all power tools, they are best used by someone with experience and insight into how to use them appropriately. It is important that the person relying on the Automated Machine Learning tools be able to sense when something seems off and be able to perform the necessary steps themselves.
While this example demonstrated Azure Automated Machine Learning from the UI with no code required (except a client if that is necessary), it is possible to create the AutoML steps programmatically.
While AutoML is certainly a step along the broader Artificial Intelligence path, we still need human intelligence to help guide it, understand it and use it responsibly.