Smooth Move – Taking Data to the Cloud with Talend

Organizations are rapidly making the move to cloud computing, with no signs of slowing down. The solution is cheaper and more widely used and, as a result, cross database conversion is becoming prevalent. Let’s look at how you can move data from an on-prem PostgreSQL Database to an Azure SQL Database, leveraging the Talend Open Studio for data integration.
Industry-leading relational database engines are very similar to one another; however, they are not identical in their supported data types, metadata or internal data manipulation capabilities. For example, you might need to extract data from a cloud-based storage for processing on-premises and load back into the cloud. Your evaluation and planning process will highlight the physical limitations inherent to migrating data from on-premises locations into the cloud.
Therefore, it is especially important to evaluate and plan a graceful move from an on-prem storage to your new cloud. To succeed, you will need to adopt the right suite of tools or find a technology partner to help you move your data.
How the transfer works
The complexity of this process is largely dependent on your individual business requirements. Here’s a simple ETL job transferring data between an Azure SQL Database and a PostgreSQL DB utilizing Talend’s Data Integration tool (to follow this process, we assume you are familiar with the basic functionality of the software).
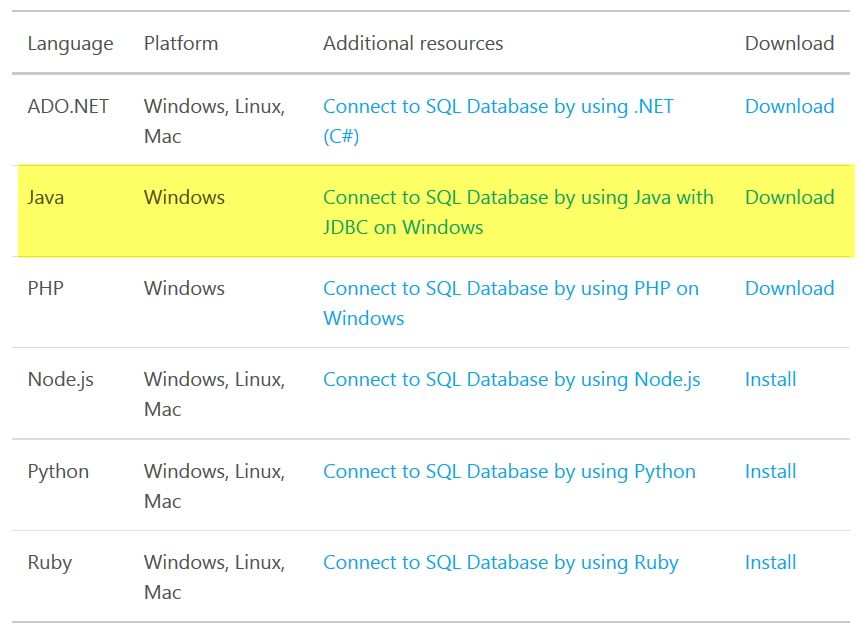
The first step is to initialize your connection to both the PostgreSQL DB and Azure SQL DB. While this may seem obvious, there are steps you’ll need to consider in order to make a successful connection to Azure using this tool. Moving data from Azure with Talend requires the JDBC library. Consequently, Microsoft provides a series of connection libraries for SQL Database and SQL Server. Follow the link provided to download the latest Java Language driver highlighted.
Next, make sure this is part of your connection library in the Talend folder, since this is essential to establishing a JDBC connection to Azure.
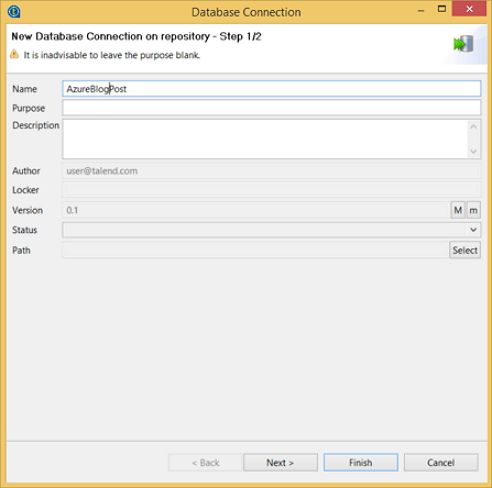
Now we are ready to make our connection to Azure and PostgreSQL (we are going to safely assume you are comfortable connecting to PostgreSQL). To connect to Azure SQL Database, launch Talend and create your metadata under DB connections as shown below. The available connections in your metadata in Talend should resemble the figure below, one connection for source and target.

Create a JDBC Connection to Azure SQL Database
1. Name your DB connection
2. Input the connection strings and settings as depicted in the figures below. Replace with your parameters as required.
DB Type: General JDBC
JDBC URL: jdbc:sqlserver://servername.database.windows.net:1433;databaseName=YourDB;user= YourUserName;password= YourPWD
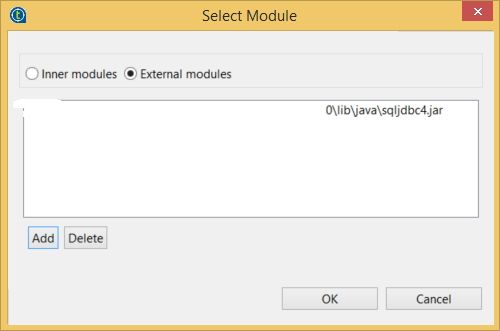
Driver jar: Point to the Talend connection library folder. To do this, select the eclipse and in the resulting dialogue box, click external modules and navigate to the path where your jar file downloaded above is stored and add it.
Class name: com.microsoft.sqlserver.jdbc.SQLServerDriver
User name: YourUserName Password:YourPassword Schema:YourSchema Mapping file:mysql_id

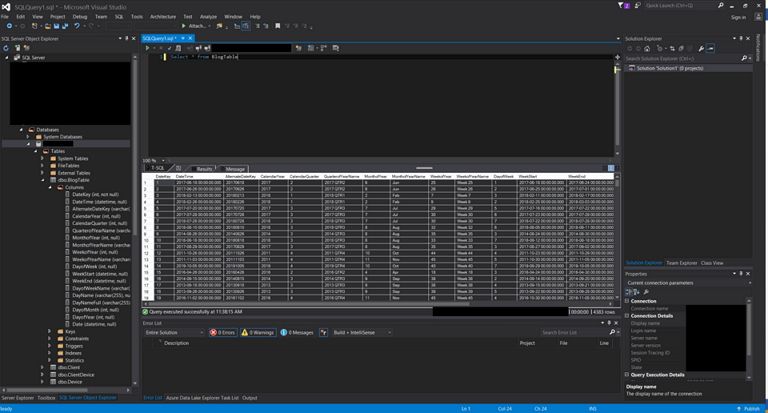
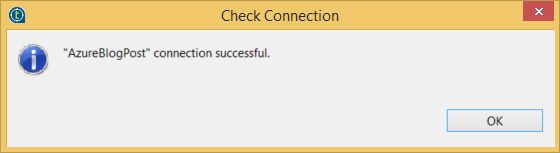
Now you check the connection.
As you can already see, there is a difference between how you connect to Azure on Talend other databases. What we have achieved here is an introduction to another powerful component of Talend Data Integration Tool.
From PostgreSQL to Azure SQL DB
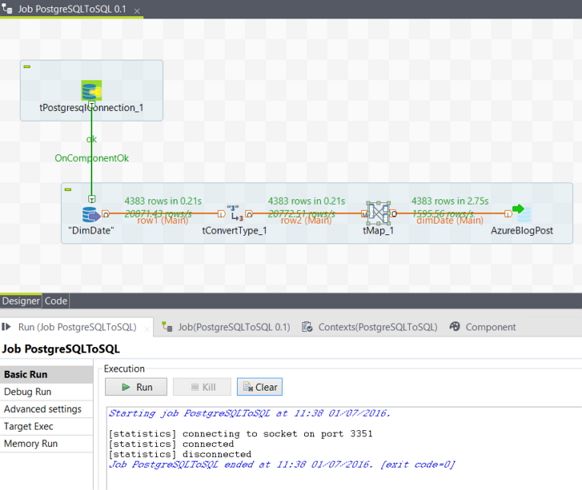
We are now ready to move data from our PostgreSQL to Azure SQL DB. For the purposes of this demo, we will only interact with a single table between the source and target. First, drag the components into your workspace as shown in figure 8 below. For your Azure component, drag the connection and select the component to create – tJDBCOutput since it is our target DB. See figure below:

The Azure component setting should have the following setting. Keep in mind, the target table should already exist in your Azure SQL Database.

Now it’s time to run the job, as the figure below shows the job status and notification.