Part 2: Adding Views Using Thymeleaf (and JSP if you want)
In Part 1 of this series, we set up a sample application using Spring Boot and some of it’s default configuration options. Now that we’ve got the shell of an application, we can start adding content to our application. By adding a single dependency to our project and using Spring Boot’s auto configuration settings, we get a free Thymeleaf configuration that’s ready to go.
For this installment, I’ve created a copy of the code from part 1 and created a new project. It’s committed to Github, ready for cloning.
Adding The Dependency
In the dependencies section of your build.gradle file, add the following entry:
[code language=”groovy”]
compile("org.thymeleaf:thymeleaf-spring4:2.1.2.RELEASE”)
[/code]
The end result should leave your build.gradle following looking like this:
[code language=”groovy”]
buildscript {
repositories {
maven { url "http://repo.spring.io/libs-snapshot" }
mavenLocal()
}
dependencies {
classpath("org.springframework.boot:spring-boot-gradle-plugin:1.0.1.RELEASE")
}
}
apply plugin: ‘java’
apply plugin: ‘eclipse’
apply plugin: ‘idea’
apply plugin: ‘spring-boot’
apply plugin: ‘war’
jar {
baseName = ‘part-2’
version = ‘0.1.0’
}
repositories {
mavenCentral()
maven { url "http://repo.spring.io/libs-snapshot" }
}
dependencies {
compile("org.springframework.boot:spring-boot-starter-web")
compile("org.thymeleaf:thymeleaf-spring4:2.1.2.RELEASE")
testCompile("junit:junit")
}
task wrapper(type: Wrapper) {
gradleVersion = ‘1.11’
}
[/code]
Running a simple ‘gradle build’ from the CLI will install this new dependency.
Building On Part 1
At the conclusion of Part 1, we had a single controller in our project configured as a @RestController, which returned a simple string. To start using our new Thymeleaf installation, we need to create a view, and make minor changes to our controller.
The auto-configured Thymeleaf install looks for Thymeleaf templates to be available as resources on the classpath in a folder named ‘templates’.
Create a resources folder, and a folder named ‘templates’ within it, such that your project’s directory structure appears similar to the following:
Creating A Template
Thymeleaf templates are intended to be natural – as close to straight HTML as possible, and easily interpreted by browsers and developers alike. Thymeleaf is packed with several dialects, and takes the place of JSP in the default stack provided by Spring.
Inside of our new templates folder (/src/main/resources/templates/), we need to create a new template that we’ll use as our first view. Create a file named “hello.html” that contains the following text:
[code]
<!DOCTYPE html>
<html xmlns="http://www.w3.org/1999/xhtml" xmlns:th="http://www.thymeleaf.org">
<head lang="en">
<meta charset="UTF-8" />
<title>HELLO</title>
</head>
<body>
<p th:text="${message}"></p>
</body>
</html>
[/code]
There are two important parts of this simple example: First, in the html tag, you’ll see two new attributes that set up template to be processed by Thymeleaf. This will give the page access to use the family of “th” attributes in html tags, thereby having access to the features available in the basic Thymeleaf dialect. Second, in the body of the page, there is a “p” tag with a simple “th” attribute. We’ll see the usage of this shortly.
Modifying The Controller
As previously mentioned, our @RestController must change to return a processed view template instead of a simple String, as it does now. First, open our existing controller class, SampleController.java, and change the marker interface from @RestController on it so that it reflects a simple controller (@Controller).
[code language=”java”]
@Controller
public class SampleController {
[/code]
In order to provide our Thymeleaf template with data to display, we need to change our method’s signature to accept a Model, which we can then begin to populate. Model is much like it was in previous versions of Spring MVC – an arbitrary collection of java objects that can be displayed and bound to views. The framework will provide our controller method with an instance of a Model object for us populate. Change the “index” method on the SampleController to have the following signature:
[code language=”java”]
public String index(Model model) {
[/code]
Next, we’ll populate the “message” attribute of the Model instance so that we can see our message in our newly created view. Update the SampleController to do just that:
[code language=”java”]
@RequestMapping("/")
public String index(Model model) {
model.addAttribute("message", "HELLO!");
return "hello";
}
[/code]
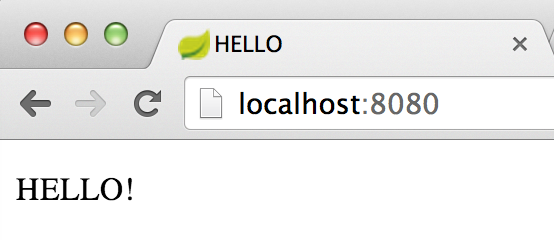
Start your server to see our new page in action.
This is a very basic example, but you can see that the “${message}” element in our Thymeleaf template has been replaced by the element that we put in the attribute named “message” in our UI Model in our controller. Look at the page source to see the end result.
A Step Further
Let’s say you want to change the path to templates or revert to JSPs. The settings provided by Spring Boot can be easily overridden by configuring an InternalResourceViewResolver in our Application.java config file. In the example below, you can see a change to the template path as well as a change to the template technology being used.
[code language=”java”]
@Bean
public InternalResourceViewResolver internalResourceViewResolver() {
InternalResourceViewResolver resolver = new InternalResourceViewResolver();
resolver.setPrefix("WEB-INF/jsp/");
resolver.setSuffix(".jsp");
resolver.setViewClass(JstlView.class);
return resolver;
}
[/code]
Of course, if you’ve changed to JSP, you’ll also have to add the appropriate dependencies to your build.gradle file. Both of the dependencies in question are available with embedded Tomcat, so they’ll be ‘providedRuntime’ dependencies.
[code language=”groovy”]
providedRuntime("javax.servlet:jstl")
providedRuntime("org.apache.tomcat.embed:tomcat-embed-jasper")
[/code]
Conclusion
Hopefully, this installment sheds additional light on the basic configuration of Thymeleaf and points you in the correct direction if you need to configure your application beyond what is provided out of the box by Spring Boot Web. Next up, we’ll review objecting binding and validation in Thymeleaf, getting deeper into the details of the Thymeleaf dialects and the functionality they provide. Again, find the complete source code for Part 2 on Github!


