AWS SageMaker Linear Learner

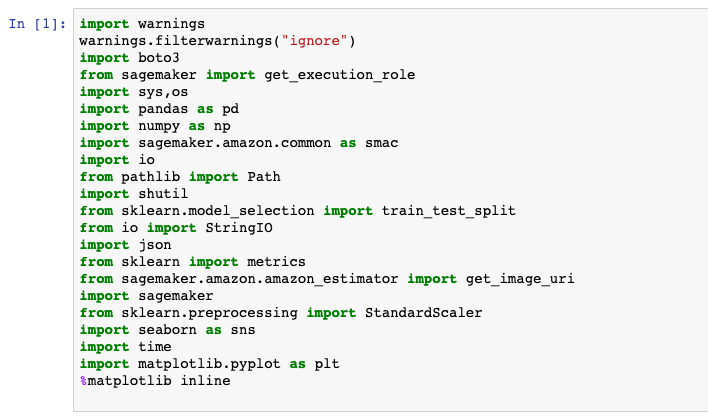
AWS SageMaker is a fully managed Machine Learning environment that comes with many models — but you are able to Bring Your Own Model (BYOM) as well. One of the first models you will likely use is the Linear Learner model.
Amazon SageMaker linear learner algorithm provides a solution for both classification and regression problems. If you are like me you probably have some experience with performing machine learning in SciKit-Learn. I wanted to take a dataset and a model and perform a linear regression in Scikit-Learn and compare that with SageMaker Linear Learner. This article won’t go into all of the details of tuning either Scikit-Learn or Linear Learner — but instead show how to take a SciKit-Learn approach and see how that maps to SageMaker Linear Learner.
The goal is this article is to show you how to get started with AWS SageMaker Linear Learner, by using a familiar Scikit-Learn Linear Model as a reference.
Is Linear Learner deep learning?
The Linear Learner is NOT deep learning. Even though if you look at the hyperparameters, you will see some familiar deep learning parameters there such as, ‘epochs’ and ‘batch size’ and ‘optimizer’, the algorithm is not using deep learning. Instead it is a distributed implementation of stochastic gradient descent (SGD).
Data Set
The dataset that we are going to use is the Abalone Data Set from UCI. What is an Abalone? An Abalone is a marine snail harvested for both food, decorative shells and as a source of mother-of-pearl.
The features are described below.
Name           Data Type  Meas.  Description
----          ---------  -----  -----------
Sex            nominal           M, F, and I (infant)
Length         continuous mm     Longest shell measurement
Diameter       continuous mm     perpendicular to length
Height         continuous mm     with meat in shell
Whole weight   continuous grams  whole abalone
Shucked weight continuous grams  weight of meat
Viscera weight continuous grams  gut weight (after bleeding)
Shell weight   continuous grams  after being dried
Rings          integer           +1.5 gives the age in years
The goal is to determine the age (age in years= rings + 1.5 ) of the Abalone based on the certain features.
Again, this article is not about the best way to solve this particular problem with a simple Linear Regression, but instead how to get started with Linear Learner in SageMaker.
Source Code
All of the source code can be found at my Github repo. There are 2 notebooks, one for the Scikit-Learn implementation and one for the SageMaker implementation
Scikit-Learn
Lets start with the Scikit-Learn approach.
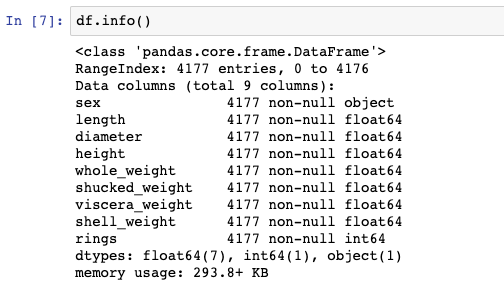
Read in the csv data into a DataFrame and call info. You will see the following:
<class 'pandas.core.frame.DataFrame'>
RangeIndex: 4177 entries, 0 to 4176
Data columns (total 9 columns):
sex               4177 non-null object
length            4177 non-null float64
diameter          4177 non-null float64
height            4177 non-null float64
whole_weight      4177 non-null float64
shucked_weight    4177 non-null float64
viscera_weight    4177 non-null float64
shell_weight      4177 non-null float64
rings             4177 non-null int64
dtypes: float64(7), int64(1), object(1)
memory usage: 293.8+ KB
There a couple of details worth pointing out.
- There is no missing data.
- There is a combination of numeric (float64, int64) and categorical (object) data.
To keep things simple — I am going to only keep the numerical columns and drop any non-numeric column.
In a handful of lines of code we can run through a very simple, albeit naive, first pass at using Linear Regression.
# Read in the data and prepare the features and targets
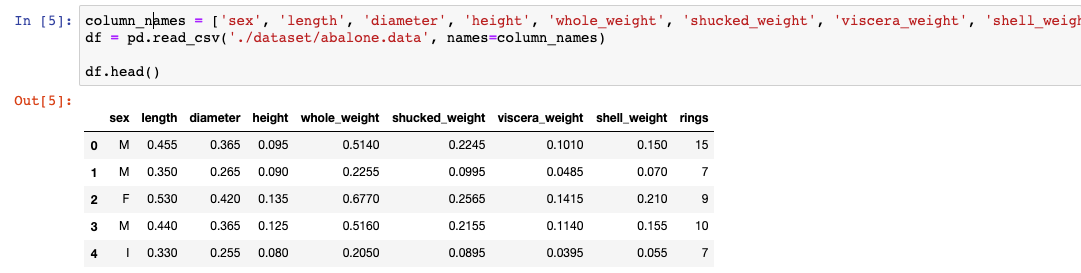
column_names = ['sex', 'length', 'diameter', 'height', 'whole_weight', 'shucked_weight', 'viscera_weight', 'shell_weight', 'rings']
df = pd.read_csv('./dataset/abalone.data', names=column_names)numeric_features = list(df.select_dtypes([np.number]).columns)
X = df[numeric_features].copy()
X.drop(columns=['rings'], axis=1, inplace=True)
y = df['rings']# create a holdout set of 5%
X, X_holdout, y, y_holdout = train_test_split(X,y, test_size=0.05)# Perform a train test split
X_train, X_test, y_train, y_test = train_test_split(X,y, test_size=0.2)# Scale the numeric values
scaler = StandardScaler()
X_train_scaled = scaler.fit_transform(X_train)
X_test_scaled = scaler.transform(X_test)# Create the LinearRegression Model
linreg = LinearRegression()# fit, score, predict
linreg.fit(X_train_scaled, y_train)
score_scaled = linreg.score(X_test_scaled, y_test)
print("Testing Results")
print(f"R^2 Score: {score_scaled}")
y_pred = linreg.predict(X_test_scaled)# compute the RMSE of our predictions
rmse = np.sqrt(metrics.mean_squared_error(y_test, y_pred))
print(f"Test RSME: {rmse}")This will produce the following output in a Jupyter Notebook for the test data

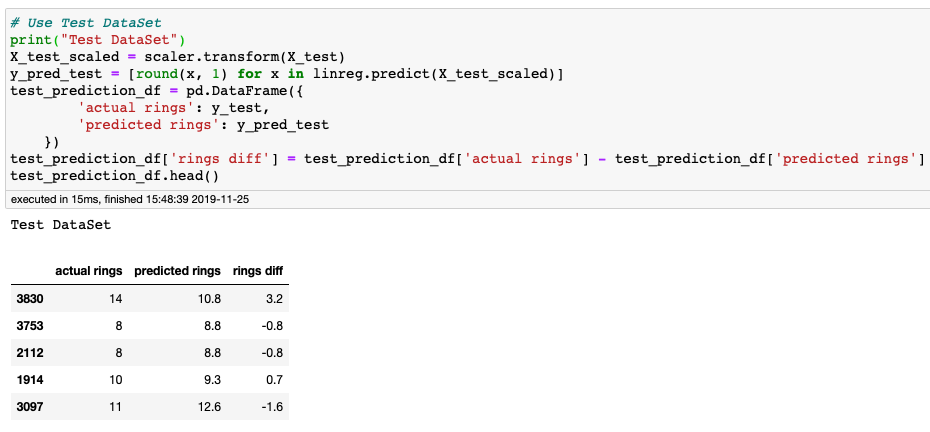
Let's see how this does on the test dataset. Using the data set aside for testing, make predictions with the test features and compare with predictions with the known target values.
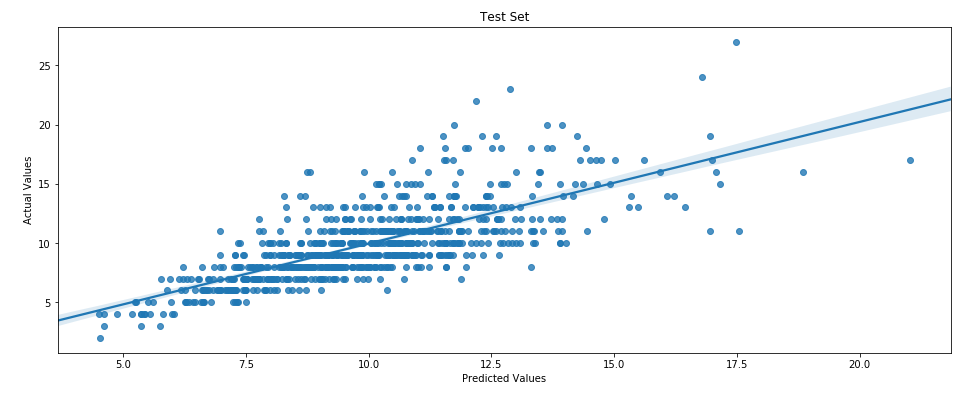
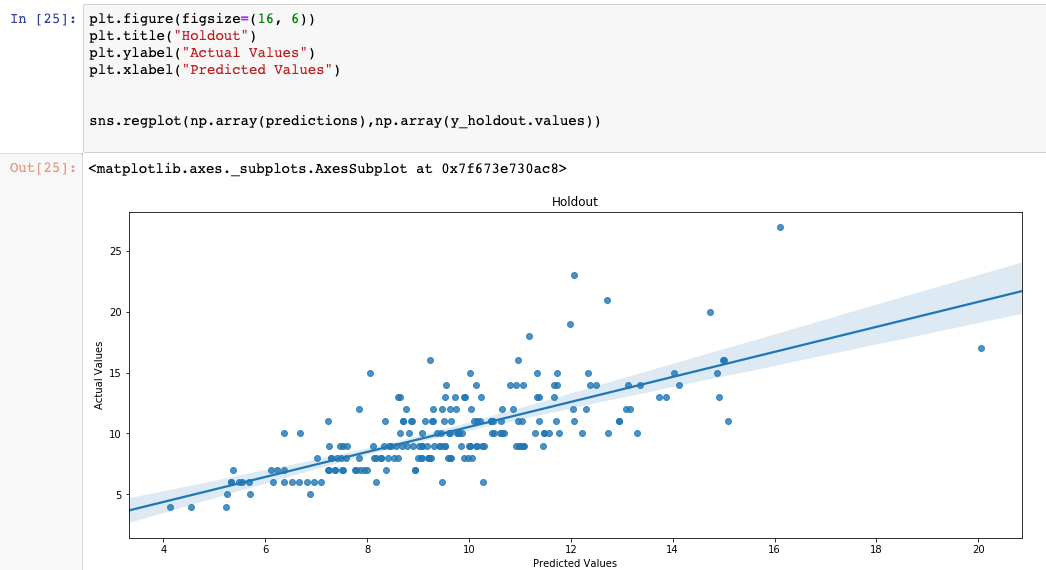
Plot of the Test Dataset Predicted Values vs the Actual Values with the line of best fit.
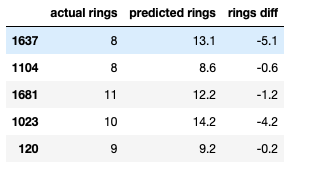
Lets see how the model performs with the holdout dataset.

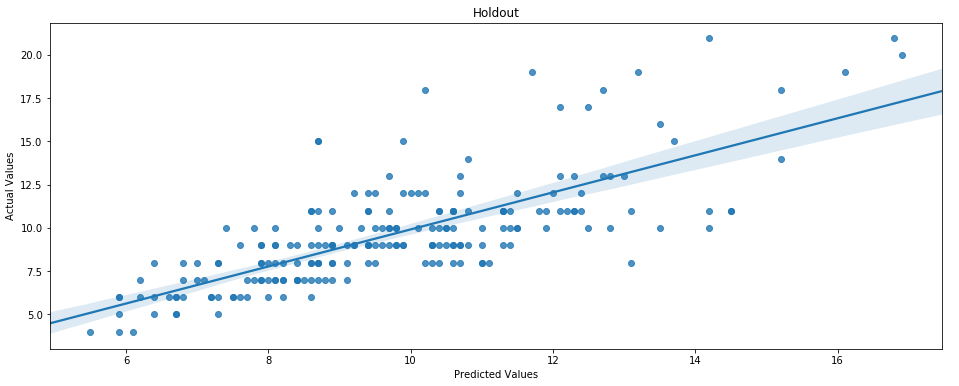
Not a great result — but we did not perform any tuning or real feature engineering. Again the reason for showing the Scikit-Learn implementation was to use as a reference implementation.
Now lets look at how to do the similar thing in AWS SageMaker.
AWS SageMaker Linear Learner
Linear Learner model in SageMaker is a very capable machine learning model. With you can perform regression, which we show here, but also classification problems. Linear Learner can explore a large number of models and model hyperparameters and choose the best one. Models can be optimized for a number of different objectives.
Input/Output Interface to Linear Learner
Linear Learner accepts CSV or RecordIO-wrapped protobuf. If using CSV the file should have no headers and the label values must be in the first column. RecordIO is a pipe mode format and is considered the best practice.
When creating an S3 bucket and starting SageMaker, make sure you do this in the same AWS Region.
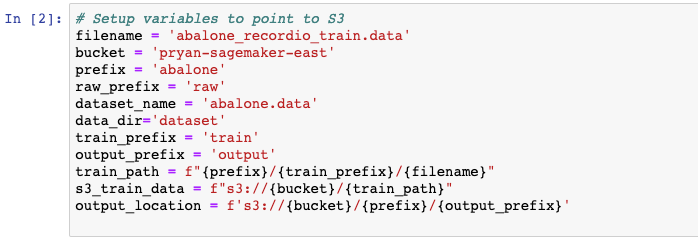
- Create S3 bucket and folders to upload data
The format used in this article looks like the following:
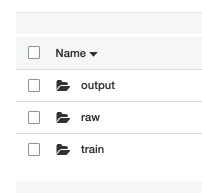
raw — will hold the original data file. The datafile is uploaded to this folder. Go ahead and upload the datafile now.

train — will hold the RecordIO formatted data file used to train the model. This folder is written to from the SageMaker Notebook
output — will hold the model output from each successful model training.
Create a SageMaker Notebook Instance
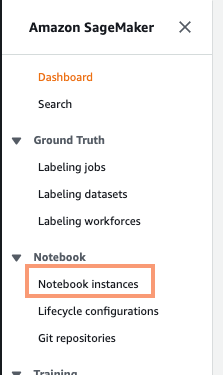
Log into your AWS management console and go to the SageMaker service. In the left navigation select Notebook -> Notebook instances
Configure the Notebook instance. For our purpose a ml.t2.medium is perfect. SageMaker will automatically create an IAM role so you can just use that
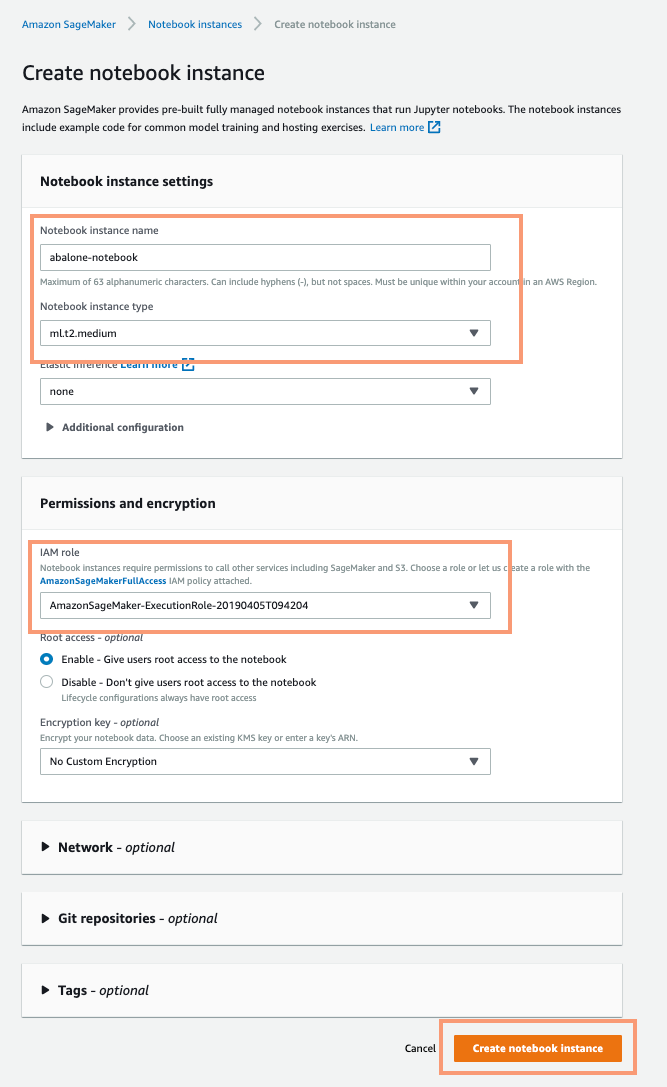
Create the instance via the ‘Create’ button at the bottom of the page. It will take a few minutes to create. When it is created the ‘Notebook instances’ dashboard will look like the following:

SageMaker is spinning up an fully managed EC2 instance to host the Jupyter Notebook along with necessary libraries for you.
Select, ‘Open Jupyter’
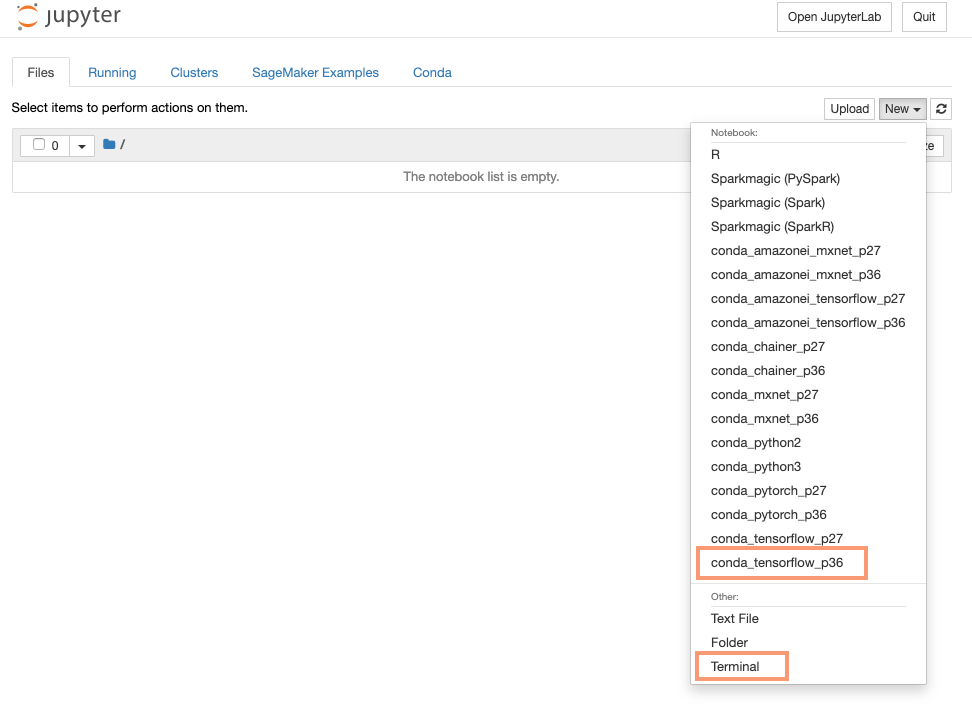
When you first open the Jupyter Notebook it will look like the following:
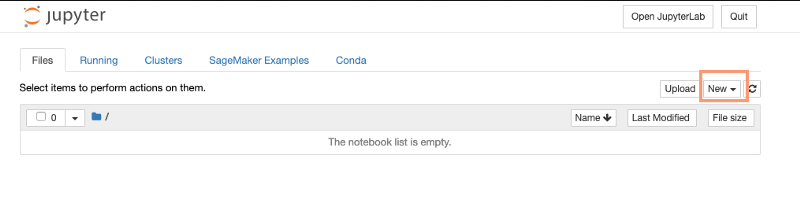
Select the ‘New’ button to create an actual notebook. You will notice a number of different types of notebooks you can create. Also notice at the bottom there is an option for ‘Terminal’. You can also create a ssh terminal window to the machine. I recommend you explore that.
For this notebook select the ‘Conda_tensorflow_p36’ option
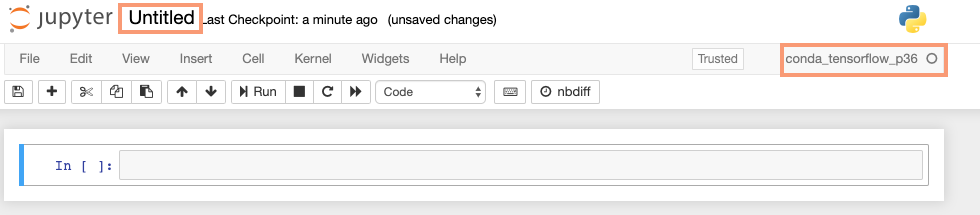
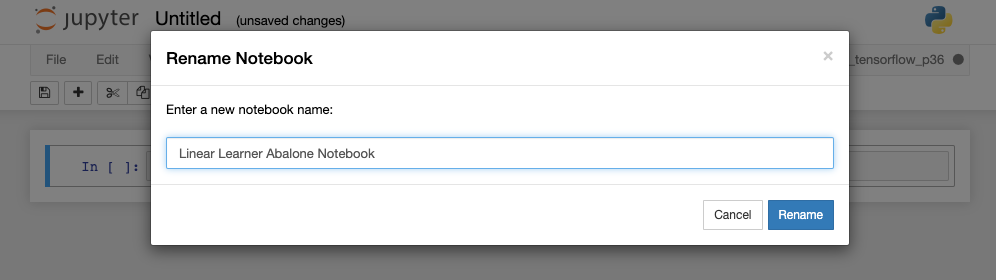
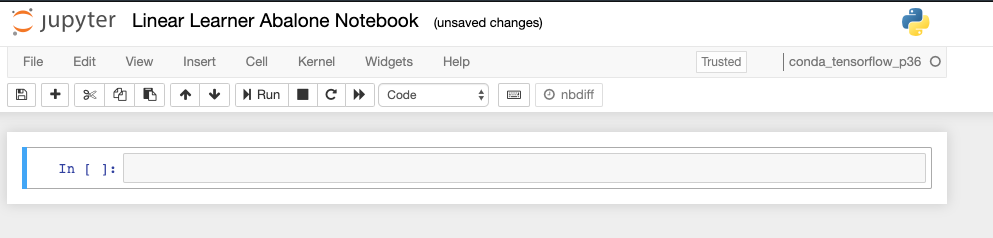
After you selected that option you will be taken to an empty notebook. The first thing I recommend you do is rename the notebook from ‘Untitled’ to something meaningful for you. To change the name, click on the word ‘Untitled’ and it will allow you to change that.
Also notice on the far upper right, it will tell you the type of notebook you running.
We are now finally ready to start to build create our model. Remember you can get the notebook at my github repo.
TK update the text above with a link to the github repo.

if you were to open a terminal window as shown above, and type pwd — you will see that the current working directory of the terminal window is ‘/home/ec2-user’. To see the data from the notebook you will have to change directory to into ‘SageMaker’. This becomes useful after you have downloaded files from S3 or have created temporary files that you would like to inspect.
So far the work we do to prepare the dataset is the same, in this case, regardless of whether we are developing with Scikit-Learn or SageMaker.
We can see that there are 4177 rows in the data and there are no missing values. There is only one non-numeric column, sex, which we will exclude for now.

Just like the Scikit-Learn version, notice we are taking the simple approach of just using the numeric features.

The train_test_split, is a little different usage than from the SciKit-Learn version. Here we are going to holdout 5% of the data as a holdout set. The 95% of the dataset will be used for training. If we had more data, we would create a Training, Validation and Test dataset.
Now that we have training data we have to store this back to S3. There are a number of different ways to handle it from here. Linear Learner will accept either csv or recordIO formatted data. The preference is for recordIO because it is more efficient. That is the approach we are going to show here. We are going to use the boto3 API to write the RecordIO formatted training data back to S3.

AWS SageMaker comes with many different Machine Learning Models. These models are available as AMIs and you can select a particular model by the name of the image.

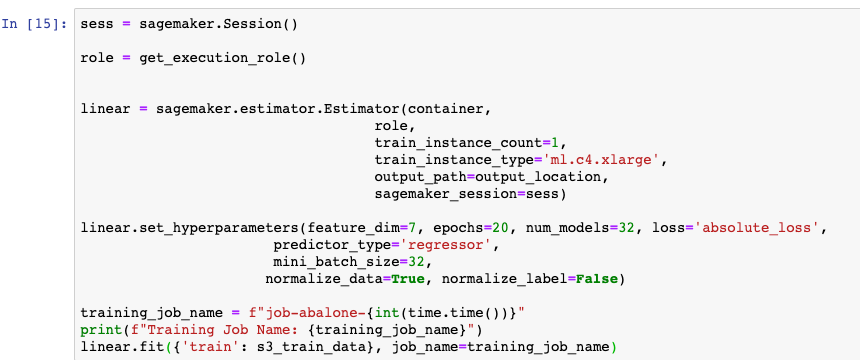
There is a lot going on in this cell.
First you create a SageMaker Session and get an IAM execution role.
Next we create an estimator from the ‘linear-learner’ container image using the Estimator api. This api will allow us to pick the instance type. Depending upon the kind of model and data we are training we would pick a suitably sized instance. We can also pick the number of instances to train across. Some data and models do not lend themselves to distributed training so consult the documentation around your specific use case.
Next we setup the HyperParameters. There are a number of hyperparameters that you can choose from so I wont go over all of them. To point out a couple here, notice that we do not scale the data using SageMaker Linear Learner. This is because one of the hyperparameters is whether the model should scale or normalize the input and output data. In this case, we just scale the inputs or features. The feature_dim = 7 refers to the 7 columns of the feature data frame (X).
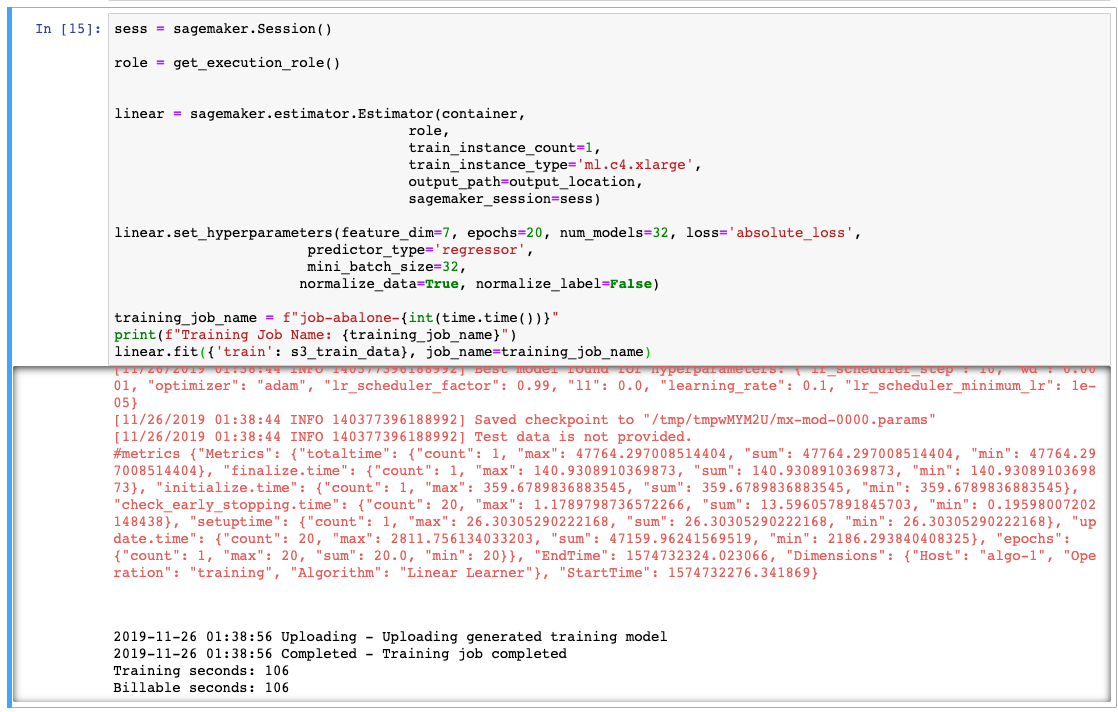
The fit() method will take a little while to complete because SageMaker is starting a ml.c4.xlarge instance for us. Linear Learner also trying many different model parameters ( L1, L2 regularization ). So behind the scenes it is doing a lot of work on our behalf. SageMaker will automatically select the best model and save that to the output_path and that is the model we will deploy.
When it completes you should see output in the cell like below. Notice that even though it took a few minutes to run, the Billable seconds is much less:
At this point we are ready to deploy our model. This will take a few minutes in terms of wall time, but the billing time will be much less. Notice that we are selecting a ml.t2.medium for the endpoint. After the model is trained, it needs much less compute power to run an inference than it does to train the model.

Once the model endpoint is deployed we can make predictions against it.
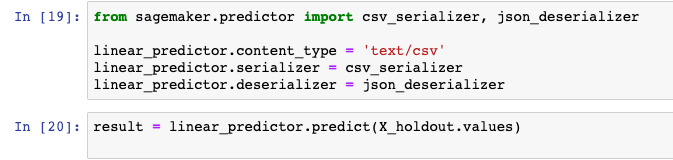
The predict method will return a json document of the predictions. We want to get the actual ‘score’ values and calculate an RMSE.

Notice that the SageMake and the SciKit-Learn RMSE are very close. Since we took a single random split with ‘train_test_split’ your value will be different but it should be in this general area.

Delete Model Endpoint
This is very important. Your model endpoint is an EC2 instance that you will be charged for by the hour. You must delete the endpoint when you are done to avoid a costly surprise later. You can always create a new endpoint from the SageMaker endpoint configuration when you need to start it again.

Conclusion
The purpose of this article was to compare the building of a simple LinearRegression model in Scikit-Learn and show how a similar Linear model can be implemented using the AWS SageMaker Linear Learner.
Some of the difference to remember are:
- All data is store in S3. You store your initial raw data in S3, but you also store your training, validation and testing data to S3
- The SageMaker model uses data from S3. You cannot give the model a local DataFrame like you can with Scikit-Learn
- The SageMaker model is actually a docker container that you get a reference to by name. In Scikit-Learn we instantiate an object that represents the model. In SageMaker we get a reference to an EC2 image and we train by startup up the EC2 instance and passing information about where the data is.
- Trained model is stored back to S3 but it is not running yet. After you have trained a model, the mode is stored back to S3, but the model is not running.
- To use a trained model you have to deploy a model endpoint. This will create another EC2 instance, which is independent of the Notebook EC2 instance and the training EC2 instance. After the EC2 instance is running the model, then we can make inference calls to it.
AWS SageMaker is a very powerful, fully managed, machine learning environment but it does take a little while to get comfortable with the workflow.
Start out with something simple and familiar to get a feel for the tooling then progress to something more challenging dataset and models.
SPR is a member of the Amazon Partner Network. Learn about our AWS expertise.
Ready for what's next?
Together, we can help you identify the challenges facing you right now and take the first steps to elevate your cloud environment.