How to Create an App in PowerApps and Flow

Limited coding skills? No problem! Microsoft’s recently released PowerApps and Flow are powerful tools that give non-developers a solution for building your own applications. To get you started, we’ll create a simple PowerApp as an example of how easy the process is. Follow along and by the end of the blog, you will have a freshly developed sales administration app.
What are PowerApps and Flow?
Let’s begin with a basic understanding of the programs. Flow allows you to create recipes that connect to a robust number of web services and data sources, allowing the user to create and string together metadata triggered events in a workflow style. For instance, you can have a Flow set to copy any Tweet with a specified hashtag and then copy the text of that Tweet to a SharePoint list in Office 365.
PowerApps is an application that allows a user to easily create data-driven mobile apps and deploy them within your organization. The publishing process is facilitated by a mobile app available for Apple, Android, and Windows, allowing you to download and run your PowerApps on your consumer’s mobile devices.
This blog will concentrate on creating a simple PowerApp. The app will allow your sales staff to access information from Salesforce.com, data processed by PowerBI, and tasks stored in SharePoint. We will focus on the use-case of accessing leads in Salesforce.com, being able to update a lead record, and saving that information back.
Creating a Sales Admin App
Creating an app using a data source (Salesforce.com in this case) is easy. You can add a new home screen to expand the app to leverage multiple data connections, thus creating a more robust, business-need specific application. This helps to demonstrate how PowerApps can allow your organization to unleash the potential of its data.
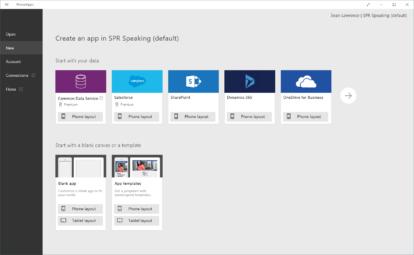
You have two choices when creating a PowerApp: use the web version or download the PowerApps Studio from the Windows Store. We will be using PowerApps studio in this blog.
- Choose New in PowerApps Studio and click on the arrow to the right pointing in the right direction.

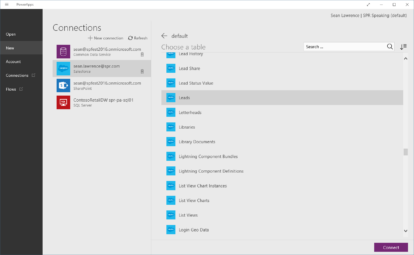
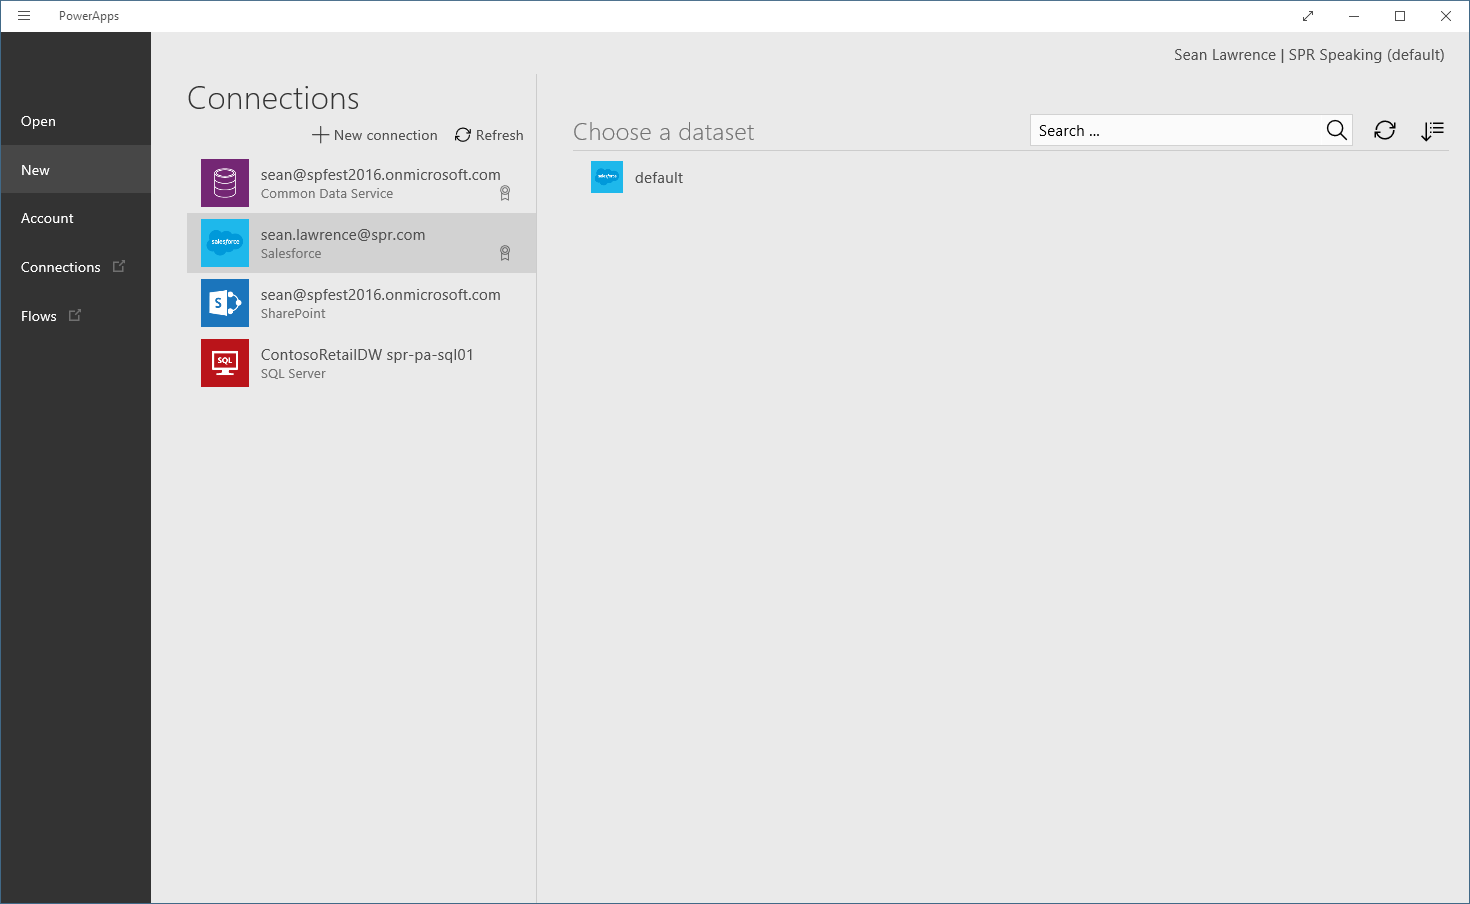
- We already have a Salesforce connection here. Click on that data source.

- Click on the default dataset.

- Since our goal is to leverage Leads information, choose the Leads table.
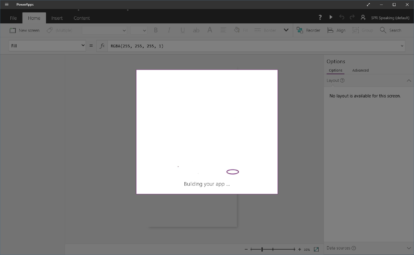
- PowerApps generates our application scaffolding.
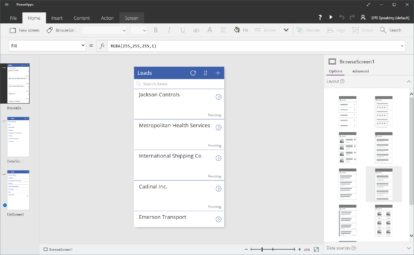
- Voila! We already have a fully functional CRUD capable mobile app. We could stop here and have a usable application, but let’s make some additions.
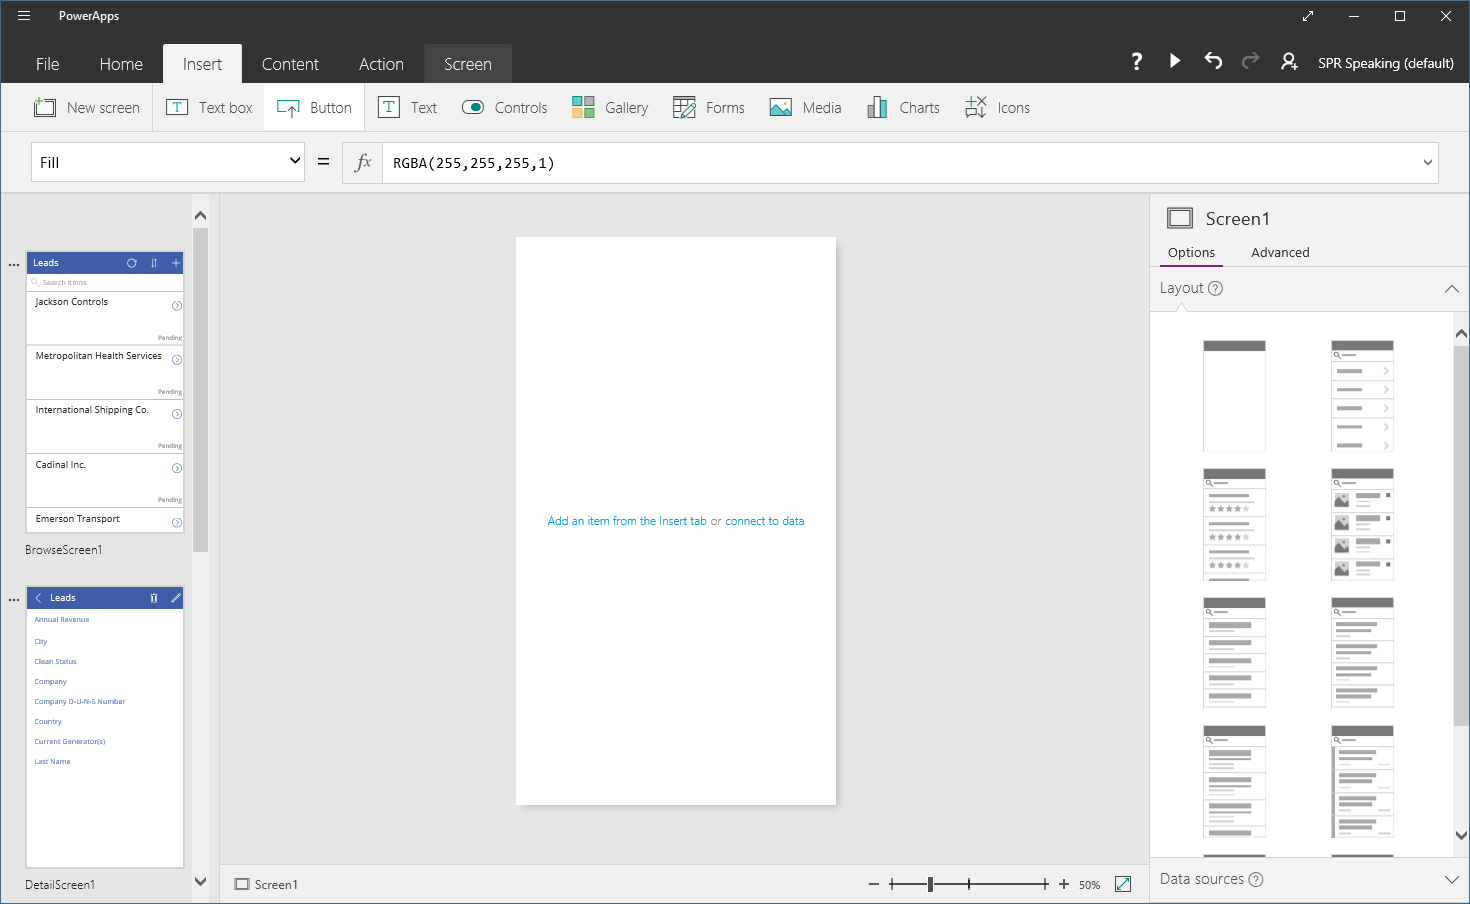
- Add a new screen.

- Begin adding buttons and images using the Ribbon above the workspace.
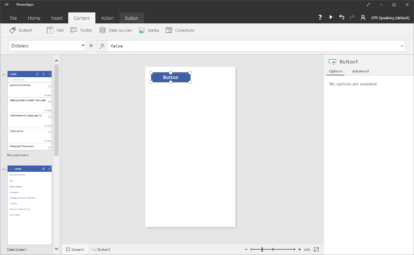
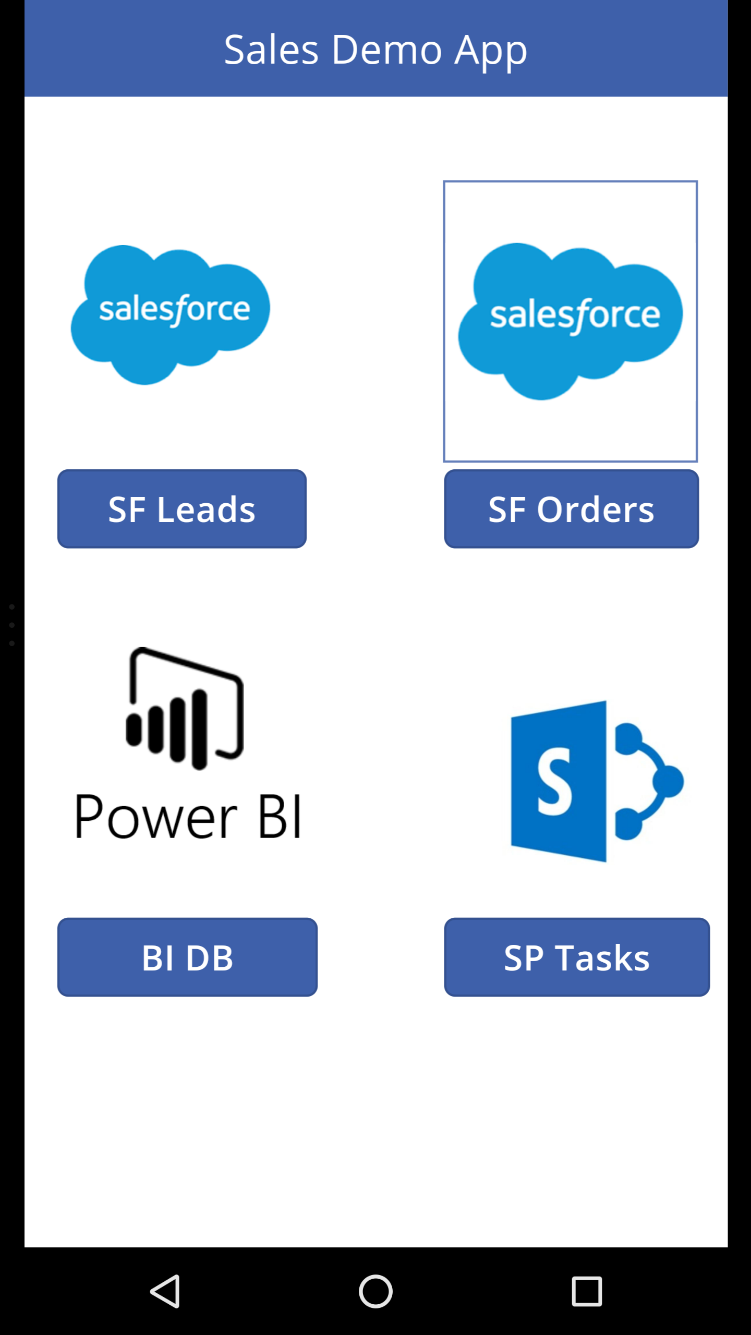
- You can see the current Salesforce Leads icon and button and the future state functions on the home screen we quickly created and dragged to the top screen list to the left of the workspace.
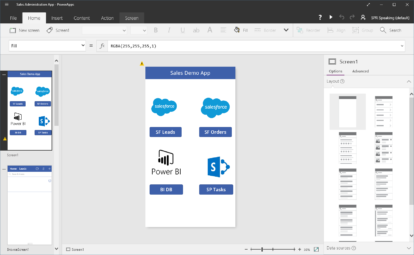
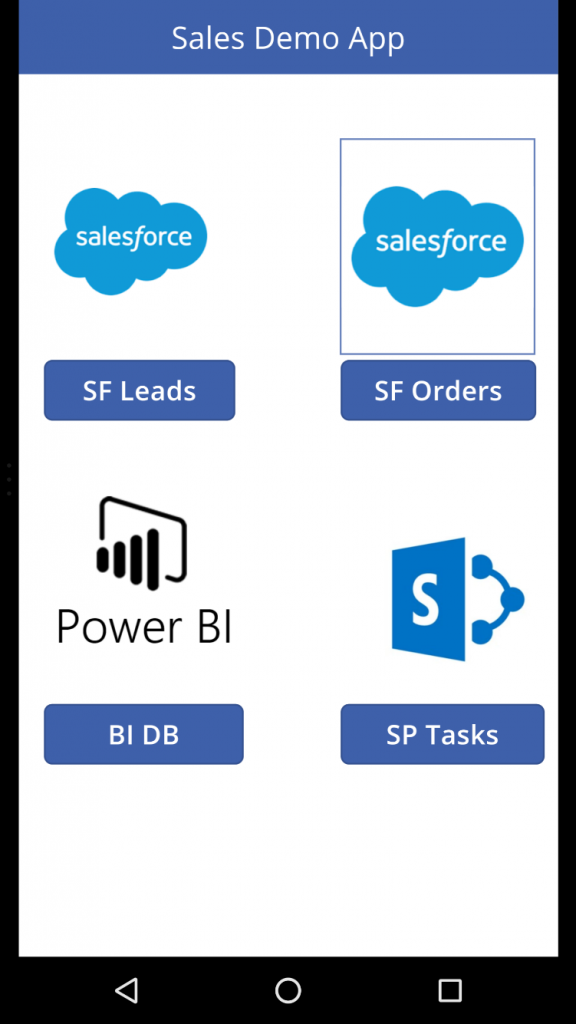
- Press the play button in the upper right-hand section of the studio and run the mobile app as you would see it on a mobile device (we’re actually using rendered images from a mobile device for greater fidelity). Below is the home screen representing the pathway to the current data connection (Salesforce leads) and future state data connections.
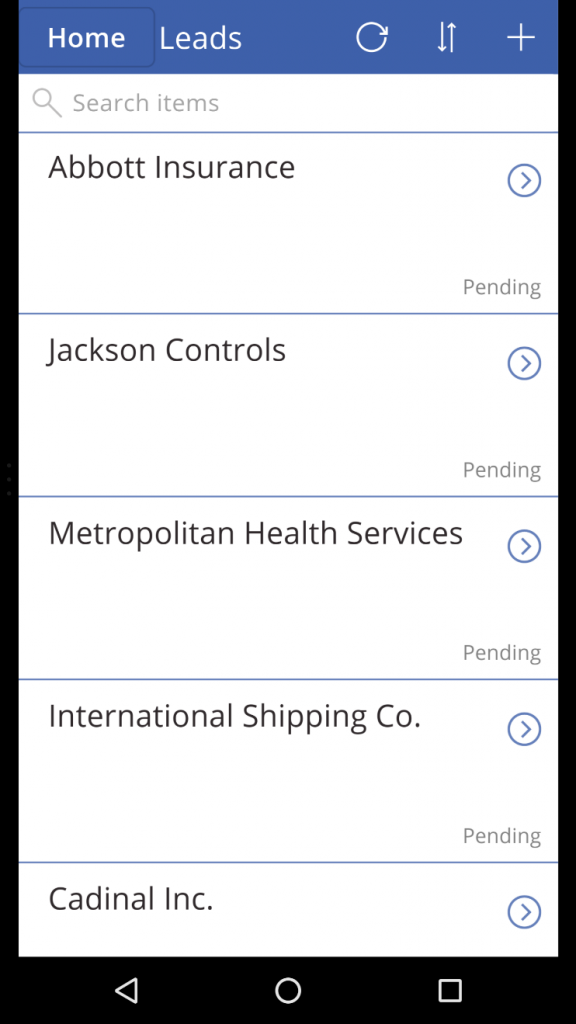
- Below is the screen that allows you read entries in the lead table from Salesforce.

- Once you click on a client lead, you see the details of that lead.
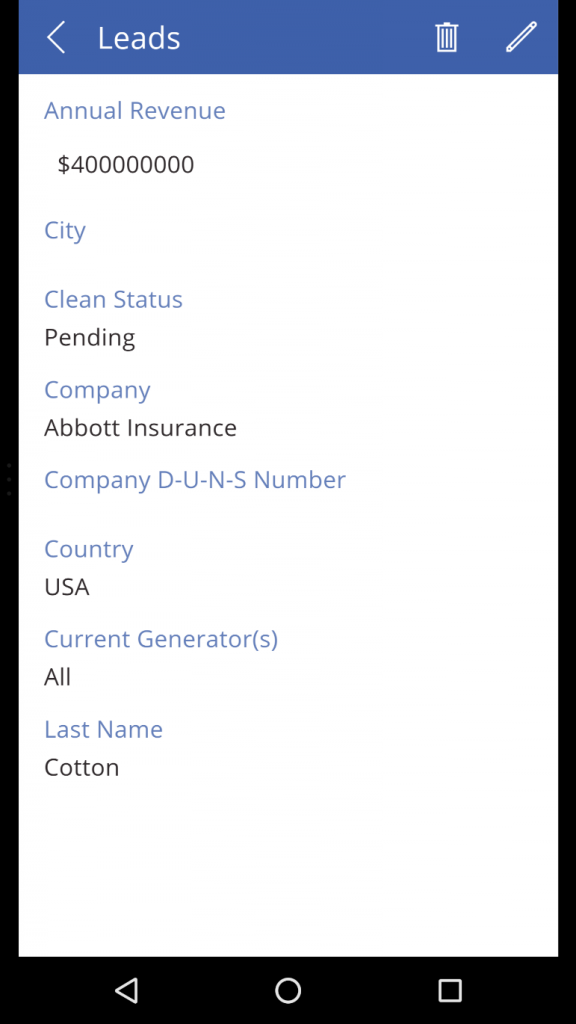
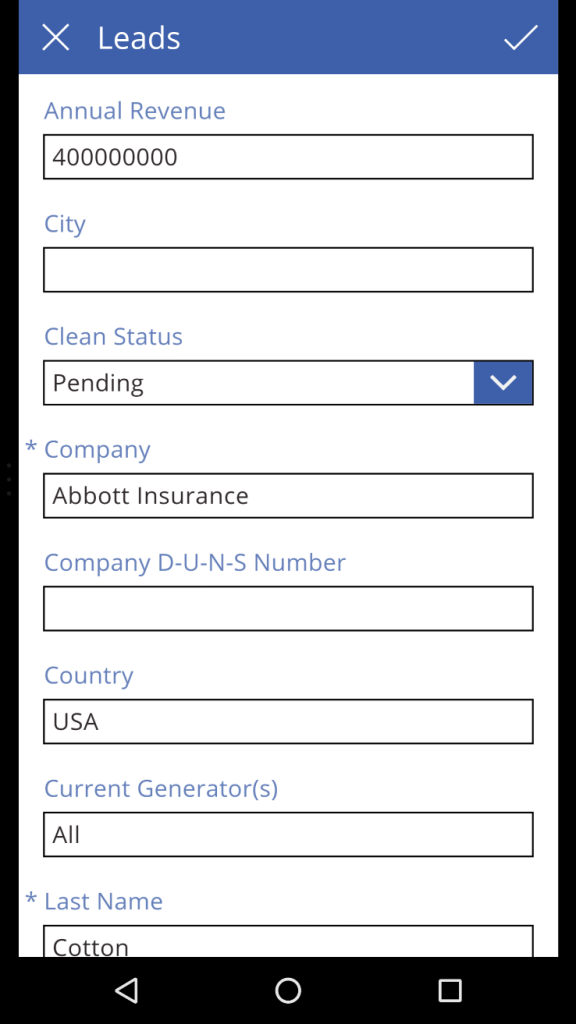
- The pencil icon allows you to edit the details of the record. When you click on the checkbox it will save directly back to the Salesforce lead table.


So there you have it! This demo takes about a total of 30 minutes to complete, provided the data sources are in place. You now have a ready-to-publish mobile app available to socialize with the sales staff in your enterprise.